Your Google Workspace Account which includes Google Mail, Google Drive, Google Calendar has a 16GB limit. For more information on Storage please see the Google Housekeeping Article.
Staff Email

Your Staff email account is powered by Google mail.
You can go to mail.google.com to login to your email inbox.
As your staff account is a Google account, you also have access to other Google services.
Google Calendar Google Drive Google Docs
Your Google Workspace Account which includes Email and Google Drive has a 16GB limit.
Expand a section below for more Google mail information.
Google 2 step authentication
Google Apps allows access to files and work from almost any device in any location, but the down side is that if someone else manages to steal, crack or guess your password then they can get to it too. This can be incredibly damaging, even for people who do not think they have much sensitive data, as the account could be used maliciously.
It is mandatory that staff use Google 2-Step Verification on their staff Google account.
2-step verification adds an additional layer of security to your account because your account is protected by your password and your phone.
It is recommended that staff set up at least two different 2-Step Verification methods to ensure that you can still access your account if (for example) you lose access to your phone.
Email topics
Bulk mail process
It is necessary for Information Services to have a process for enabling bulk mail because Google mail have daily and hourly sending limits to prevent scam email campaigns through their services.
Microsoft Outlook is used to send bulk mail because it allows Information Services to specify its own infrastructure for outgoing mail instead of Google, therefore, enabling control over sending limits. While this can be achieved with other email clients, Microsoft Outlook is readily available to all University of Portsmouth staff members using a Microsoft Windows machine and is familiar to a high proportion of Microsoft Office users.
Requesting bulk mail
If you are requesting bulk mail for a shared mailbox, it is expected that you will already have delegate access provided by the account owner. To request an email account to have bulk mail set up, complete the bulk mail request form.
After access has been set up by Information Services, it is then requested that you begin a chat session so that Microsoft Outlook can be configured for the account specified.
In Google Mail, Contact Groups are used to create a personal distribution list. In the Google Groups application, distribution lists can be created which can be shared with your team or other colleagues.
A shared Google Groups distribution list can be created by following these steps:
- Create a new Google Group
- Add e-mail addresses to the group
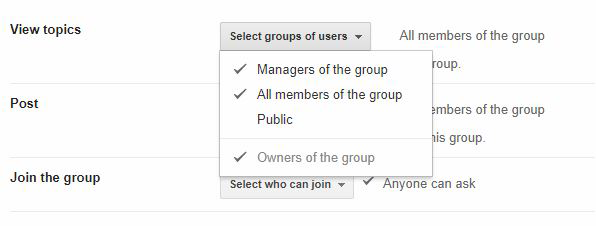
Google group settings
It is recommended that when creating a Google Group the following settings are used for View topics
Further information
Further information on Google Groups is available on these Google web sites:
If you use a mail app or client and you'd like to send and receive your University emails from the same account, you might need specific settings.
You'll need the IMAP or POP3 server address to receive your Gmail emails in your mail client. We recommend you use IMAP where possible. You'll need the SMTP server address to send emails from your Gmail address from your mail client.
Pop Settings
- IMAP server address: pop.gmail.com
- Port number: 995
- Use SSL: yes
- Username: your student account email address (e.g. up123456@myport.ac.uk) or your staff account email address (e.g. joe.bloggs@port.ac.uk)
- Password: your computer account password
IMAP Settings
- IMAP server address: imap.gmail.com
- Port number: 993
- Use SSL: yes
- Username: your student account email address (e.g. up123456@myport.ac.uk) or your staff account email address (e.g. joe.bloggs@port.ac.uk)
- Password: your computer account password
SMTP Settings
- SMTP server address: smtp.gmail.com
- Port number: 465
- Use SSL: yes
- Username: your student account email address (e.g. up123456@myport.ac.uk) or your staff account email address (e.g. joe.bloggs@port.ac.uk)
- Password: your computer account password
A phishing attack happens when someone tries to trick you into sharing personal information online.
What phishing is
Phishing is usually done through email, ads or by sites that look similar to sites that you already use. For example, someone who is phishing might send you an email that looks like it's from your bank so that you'll give them information about your bank account.
Be sceptical of anything you are not expecting.
Phishing emails or sites might ask for:
- Usernames and passwords, including password changes
- National Insurance numbers
- Bank account numbers
- PINs (Personal Identification Numbers)
- Credit card numbers
- Your mother’s maiden name
- Your date of birth
More information can be found from Official advice pages.
Affixa is a Windows program which runs in the background and automatically handles mail creation requests from ‘mailto:’ links on webpages. It will create a new draft e-mails in the user’s web-based e-mail account.
The program is installed from the Software Centre (Start > Microsoft Endpoint Manager > Software Centre) and is preconfigured to connect to the logged-in user’s University Google Mail account via their default web browser.
- The application will start to work as soon as the installation is complete but the tray icon will not appear until the system is next rebooted.
- The application will take between 45 and 60 seconds to startup the first time it is run after installation. On subsequent calls the application will start in a much shorter time.
- It may prompt the user to login to their Google Mail account and authorise the program to access Google Mail (this is only required once and in some cases may not be required at all).
If you do not have a default mail client elected when you click on a mailto (email) link on a website, you will be asked to choose a default application. Choose Affixa. Some of you may already have specified a default mail client, commonly MS Outlook. In which case proceed to the next section.
Changing the default mail client
- On the Start menu, select Settings > Apps > Default apps You can also search for Default Apps from the start menu
- Click on the setting for Mail
- Select Affixa from the list
Browser Plug-ins
To ensure that existing Gmail tabs are reused when Affixa generates a new email message instead of opening a new tab you can install a browser extension.
If you do not currently have a password to a Shared Mailbox, but require this to grant access or utilise a 3rd party mail client (e.g Outlook or iPad), please contact the Service Desk on 023 9284 7777.
For each Shared Mailbox, a responsible person will be identified and they will be issued the password for the nominated account.
Managing Access
By logging in fully to the mailbox it is possible to gain access to all of the mail settings available to a normal staff account.
Delegate access can be managed by logging into the account and navigating to Settings > Accounts > Grant Access to your Account.
Once you have granted delegate access, the recipient will be sent an email invite which they will have to accept within a given time frame.
Using a mail client
It may be beneficial to have mails sent directly from a Shared Mailbox via an email client, such as Outlook. Where this is the case, contact the Service Desk on 023 9284 7777 for assistance.
The client should be configured using the SMTP server details for sending mail, and if required the Google mail IMAP settings should be configured for the receipt of mail.
General Guidelines
It is the responsibility of the identified responsible person to prevent abuse of this account, including but not limited to:
- Preventing the account credentials being disclosed unnecessarily, the number of people with possession of the password should be very small, usually an individual.
- Ensuring the password is only used for one of the two above uses, any other purposes should be discussed with the Service Desk or your Service Delivery Manager prior to such use.
- Ensuring the details are not released to any non-UoP staff, (Student’s and 3rd parties should NOT be given this password)
- The Shared mailbox login should not be used to send or manage emails, you should continue to use your delegate access for these requirements.
If we believe a Shared Mailbox has been compromised, the password will be reset.
Google Drive

As part of your University google account you have access to store files online on your Google Drive. You can either upload files via the web interface or you can use the desktop application to automatically backup your local folders or access your online files from your computer.
Google Drive for Desktop is pre-installed on University machines and can be downloaded for personal devices.
Instructions and advice on using Google Drive can be found on Google's website.
Shared Drives
Shared Drives are available in Google Drive, next to My Drive.
Instead of using a shared folder or a document that is owned by an individual Shared drives belongs to a team. This means documents are unable to be accidentally deleted or relocated to another folder by an individual owner and no transfer of ownership is required should a staff member leave the University. For step by step instructions on how to get started, please see the official guide below:
Getting started with Shared drives
Google Calendar

With Google Calendar you can set up in person and video meetings, book rooms and schedule busy periods in your work day.
Click to see the official user guide here.
See more Google Calendar information below:
Google Calendar topics
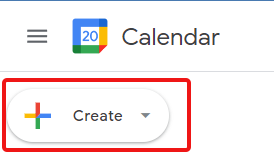
Open your Google Calendar and click the Create button to make a new event then change the time and date to when you need the room booked for.
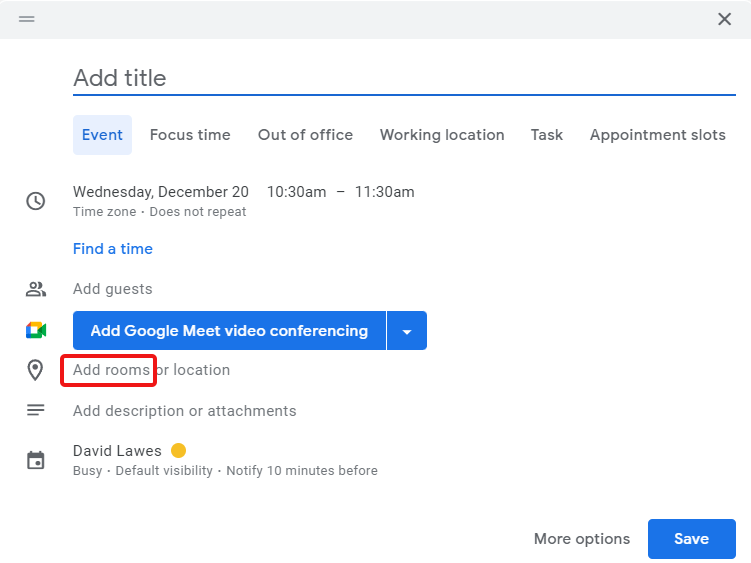
Click Add rooms
Search for a room by name or click to Browse all rooms & resources
Choose a room to add to your booking
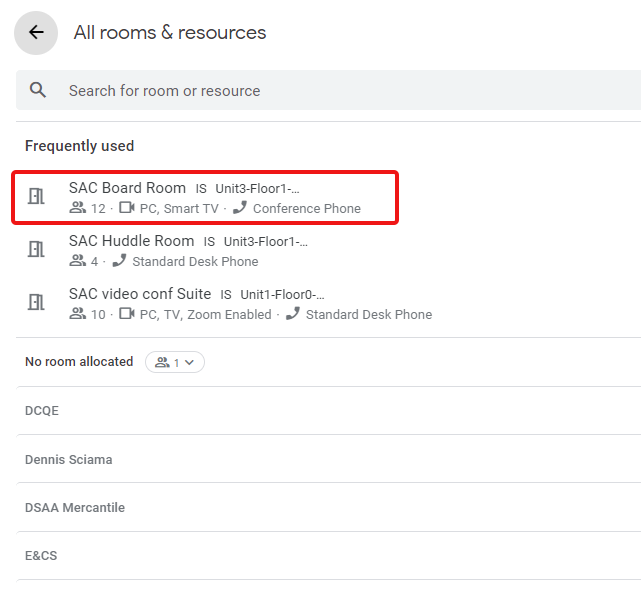
Unavailable rooms at the time you have chosen will have a strike through the name.
Save your event and complete your booking.
The instructions for setting up a subscription to allow you to access to your teaching timetable from within the Google Apps Calendar are now included in the Staff Portal Manual on pages 18 and 19.
Google Meet

As part of your University Google account you have access to Google Meet. This is a voice or video call platform with features such as screensharing and presenter modes.
Google Meet can be also be downloaded for mobile devices.
Instructions and advice on using Google Meet can be found on Google's website.
Using Google apps on other devices
This article provides instructions to set up your iOS device to access your University of Portsmouth Google Apps account.
Note: when following the instructions, if you are prompted for your user@googlemail account, use your University Google account details (e.g. joe.bloggs@port.ac.uk).
Setup Google sync on your iOS device
Alternatively you can access your Google Apps via your devices browser by typing www.google.com
Add your work Google Account to your Android device
Follow the steps below to add your work Google account to your Android device:
- From the settings on your phone, open Accounts.
- Click Add Account then choose Google.
- Sign in with your work Google Account details and follow the steps to create your work profile. The Android Device Policy will install during this process.
Android device policy information
Remotely managing your device
Further information on remotely managing your device can be found here.
Using a browser
Alternatively, you can access Google Apps via your device's browser by visiting www.google.com
From the Safari browser on your iPhone, go to the following site:
Then sign in with your Google account (e.g. joe.bloggs@port.ac.uk)
- Select iPhone under managed devices
- Tick the boxes of the calendars you wish to sync to your iPhone
- Scroll down and select save
- Then select sign out from Device Settings page
Wait until the page goes back to the login page, then go to your Calendar app and check to see if the calendars are there. You may need to refresh the page using the refresh icon in the lower left of the screen.
Need Help?
Contact the Service Desk:
- Phone: +44 (0)23 9284 7777
- Raise a Service Desk Ticket
- Start a Chat