Image

You have access to network storage space on the University's computer system and your University Microsoft account gives you access to OneDrive for storing your files.
For safety we recommend that you store important files / documents in at least two places.
If you are using a University device always store a backup copy of any work in OneDrive.
You can use OneDrive to store and access your files from any device, with 5GB of available storage. Simply sign in to Microsoft OneDrive using your University email address and password.
If you are on a University laptop or desktop your OneDrive will be mapped to the O Drive.
For more detailed support and step-by-step instructions, visit the Using OneDrive page.
There are plans to replace the N Drive with OneDrive. It has a 20GB storage capacity. If you need to access files on your N Drive you can do this on a University computer or the remote mapping function below.
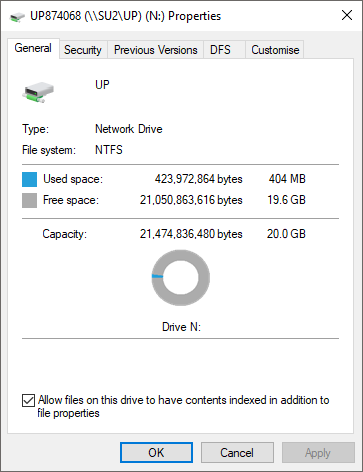
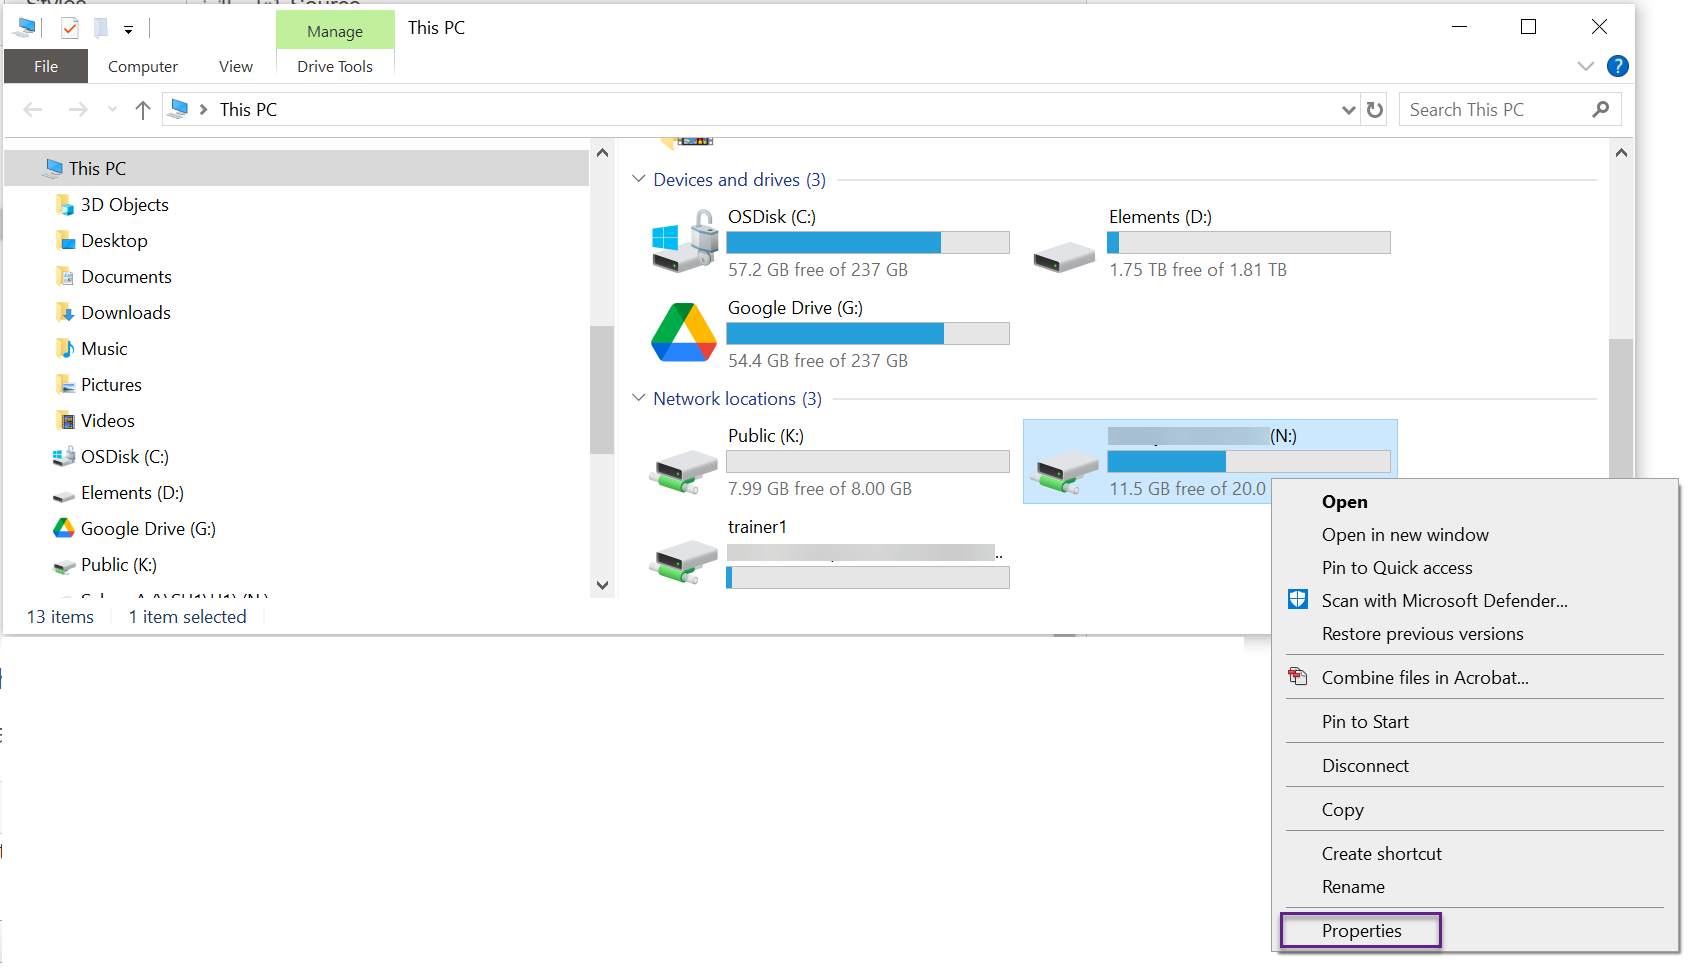
You can view your quota from a University PC by double-clicking This PC on the desktop, then right-clicking your N drive from the list of network drives, then select Properties.
The General tab will show you the amount of space you are currently using and the amount of space you have left.
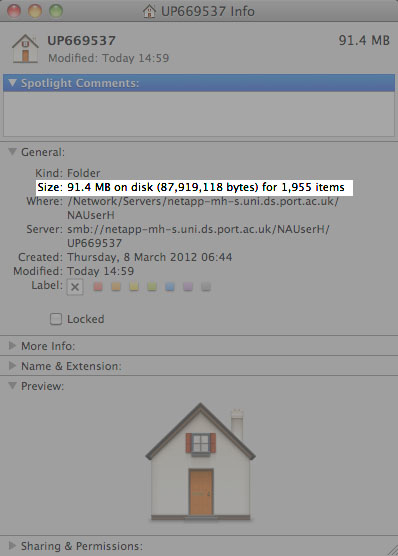
You can view your quota from a University Mac by selecting your N drive (home directory) from the sidebar and choose 'i'. After a few moments, the size of your N drive is shown in the information window.
Please note that the Macs do not give a warning message if the capacity of N drive is reached. You will receive an email stating that you should clean your N drive before that.
You can access your personal N drive and public K drive when studying away from campus.
You must connect to the VPN before connecting to the network drives when off-campus.
Step 1
Find your N drive location using Find my N Drive tool
Copy the full path under the N DRIVE (WINDOWS) e.g. \\SU2.uni.ds.port.ac.uk\UP\up874069 to the clipboard
Step 2
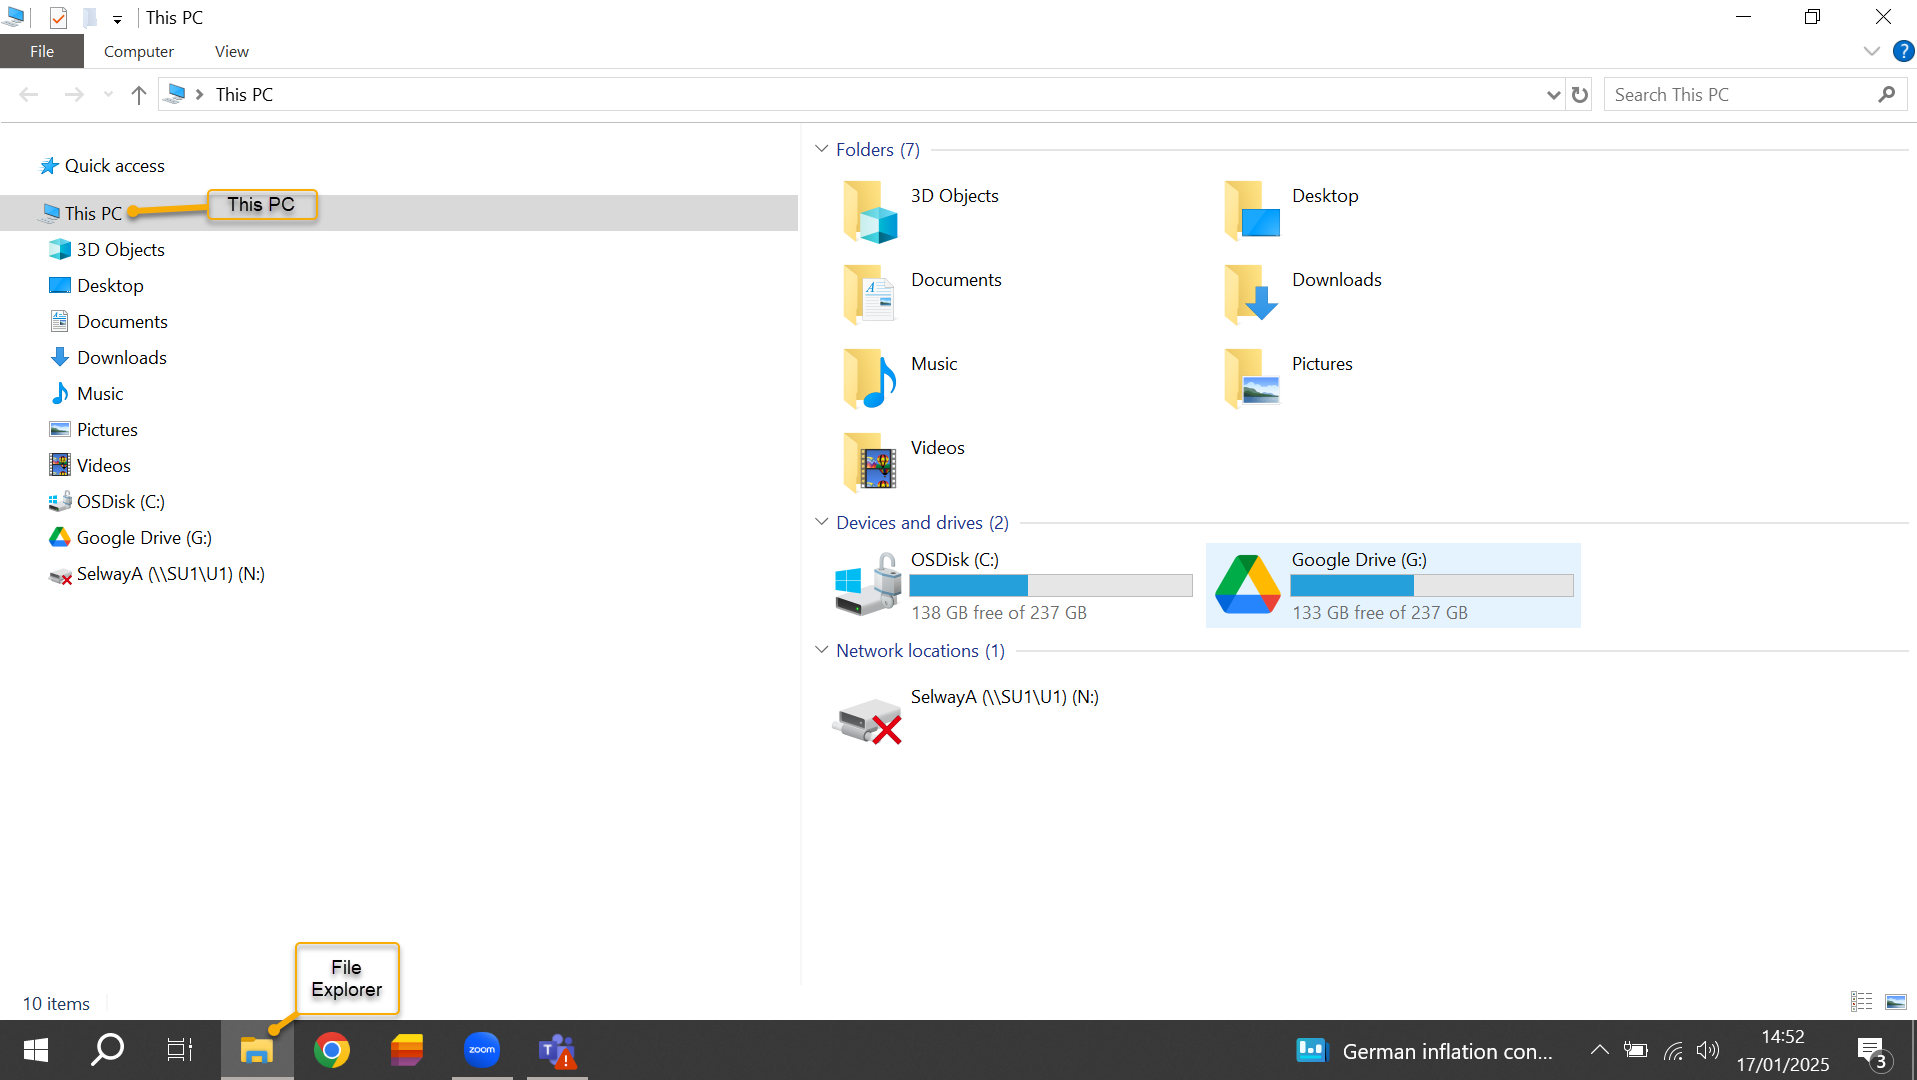
Open File Explorer by by clicking on the yellow folder icon on the Task Bar.
Select This PC from the left-hand navigation pane

Step 3
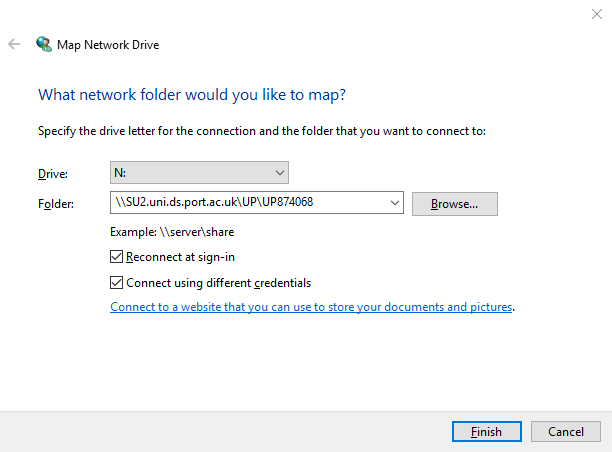
The Map Network Drive dialogue box will display. Enter the following information, then select Finish:
Step 4
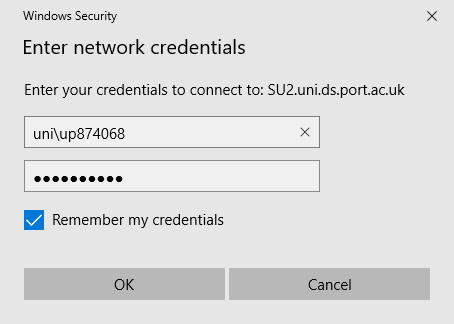
You will be prompted to enter your University username and password. You must prefix your University username with uni\ e.g uni\up123456.
Tick Remember my credentials if you wish to remember your credentials and select OK
Your N drive will open in File Explorer
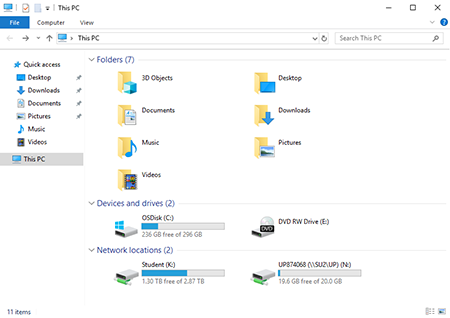
You can find your mapped network drive under Network locations in File Explorer
Step 1
Find your N drive location using Find my N Drive tool
Copy the full path under the N DRIVE (WINDOWS) e.g. \\SU2.uni.ds.port.ac.uk\UP\up874069 to the clipboard
Step 2
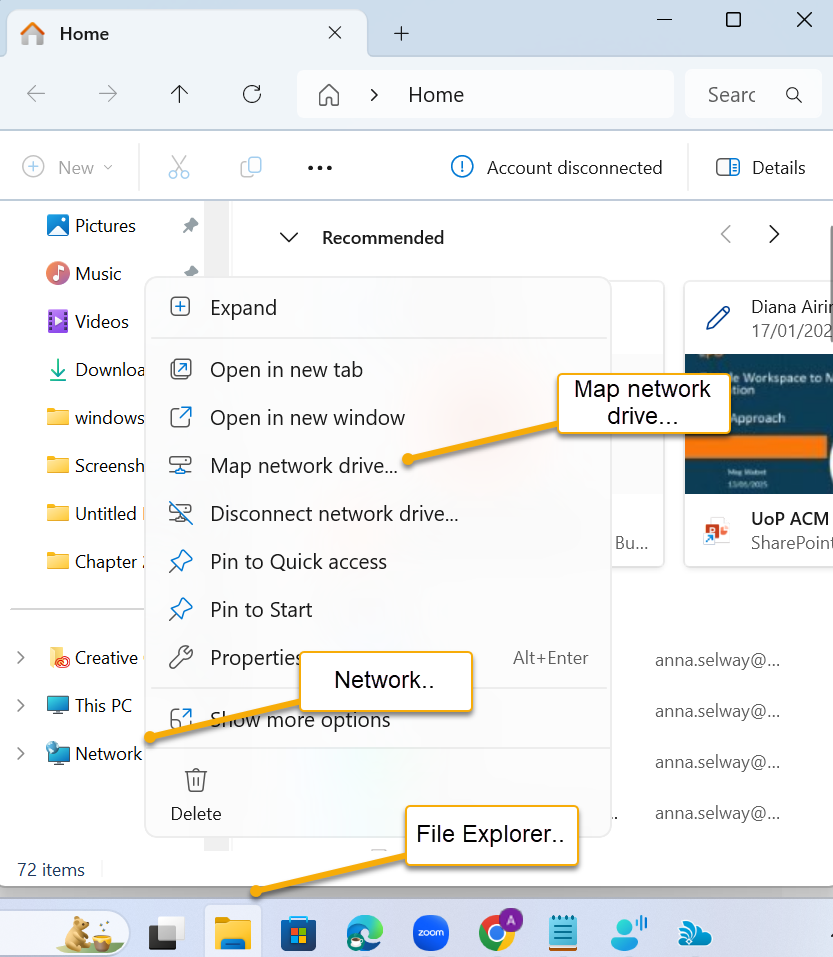
Open File Explorer by clicking on the yellow folder icon on the Task Bar
Right click on Network at the bottom of the left-hand navigation pane
Select Map network drive... from the pop-up menu
Step 3
The Map Network Drive dialogue box will display, enter the following information then select Finish:
Step 4
You will be prompted to enter your University username and password. You must prefix your University username with uni\ e.g uni\up123456.
Tick Remember my credentials if you wish to remember your credentials and select OK.
Note: If you are on a Windows 11 staff machine it may ask for your email address and password.
Your N drive will open in File Explorer
You can find your mapped network drive under Network locations in File Explorer.
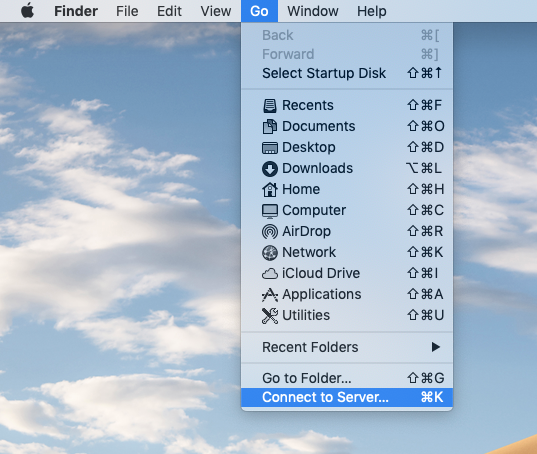
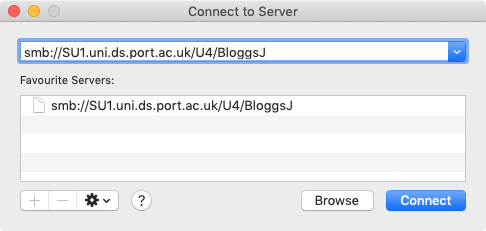
1. From the Finder menu, choose Go then Connect to Server...
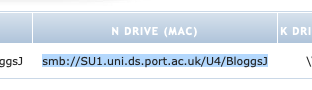
2. Find your N drive location using the Find my N Drive tool. Copy the full path under the N DRIVE (MAC) heading, e.g. smb://SU1.uni.ds.port.ac.uk/U4/BloggsJ to the clipboard.
3. Paste the N: drive path into the input box. You can use the button to add the path to your favourite servers. Then click Connect
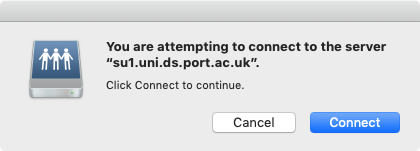
4. You may be presented with a connection warning, click Connect
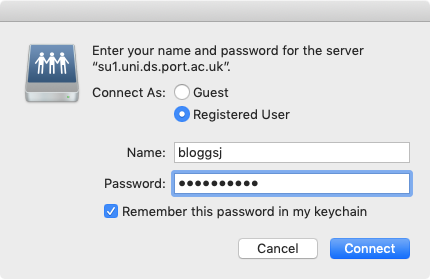
5. Enter your University username and password when prompted, if you would like to remember the login details, select the Remember this password in my keychain
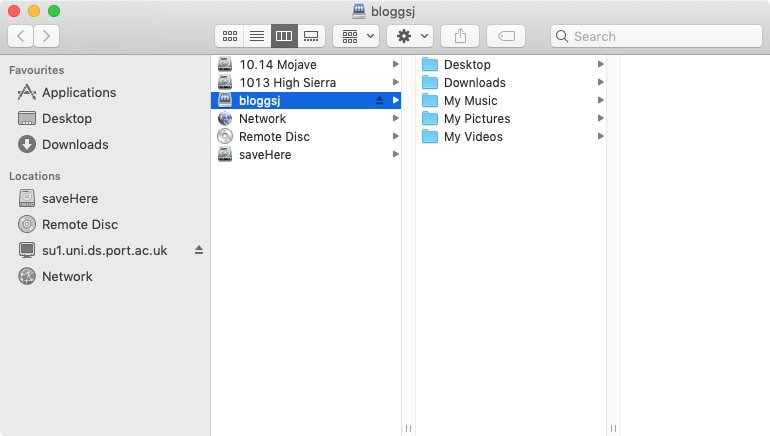
6. Your N: drive will appear in a Finder window once connected
1. Connect to the VPN.
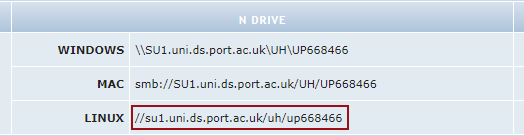
2. Visit the Find my N drive tool and look up your account. Copy the server path under N DRIVE > LINUX e.g. //su1.uni.ds.port.ac.uk/uh/up123456
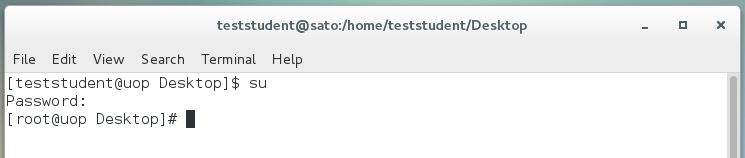
3. Open a terminal (ensure you are a superuser e.g. root, or use the sudo prefix).
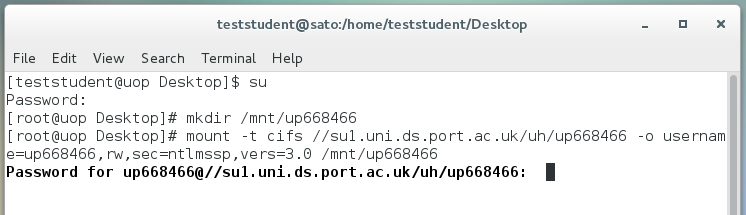
4. Create a mount point, substituting $username with your computer account username:
mkdir /mnt/$username
e.g.
mkdir /mnt/up123456

5. Mount the N drive to the mount point you just created. Ensure you use lowercase, replace $username with your username and $server with the server path found earlier.
mount -t cifs $server -o username=$username,rw,sec=ntlmssp,vers=3.0 /mnt/$username
e.g.
mount -t cifs //su1.uni.ds.port.ac.uk/uh/up123456 -o username=up668466,rw,sec=ntlmssp,vers=3.0 /mnt/up668466
6. Enter your computer account password when prompted.
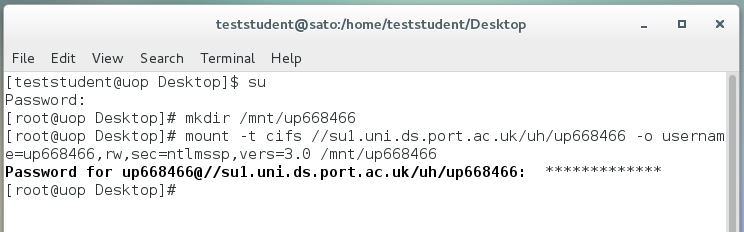
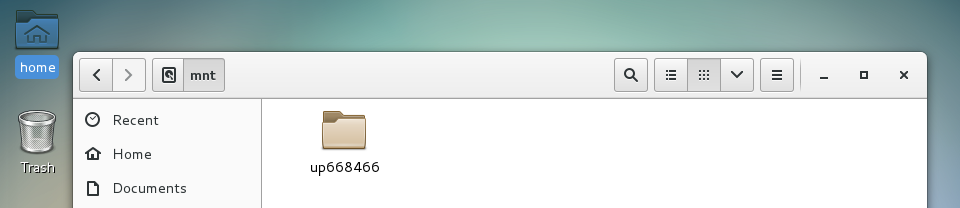
7. Your N drive will now be connected. If you prefer to browse your N drive from the GUI navigate to the mnt folder.
umount /mnt/$username
e.g.
umount /mnt/up123456

1. To map the K drive, open Windows Explorer.
2. Select This PC in the navigator pane on the left.
3. Select Map network drive from the top menu bar.

4. Enter the following information then select Finish:
5. You will be prompted to enter your University username and password. You must prefix your University username with uni\ e.g uni\up874068. Tick Remember my credentials if you wish to remember your credentials and select OK

6. Your N drive opens in an Explorer Window. You can find your mapped network drive under Network locations in Windows Explorer.
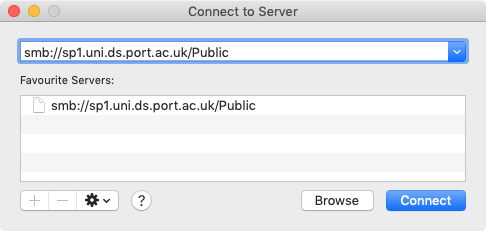
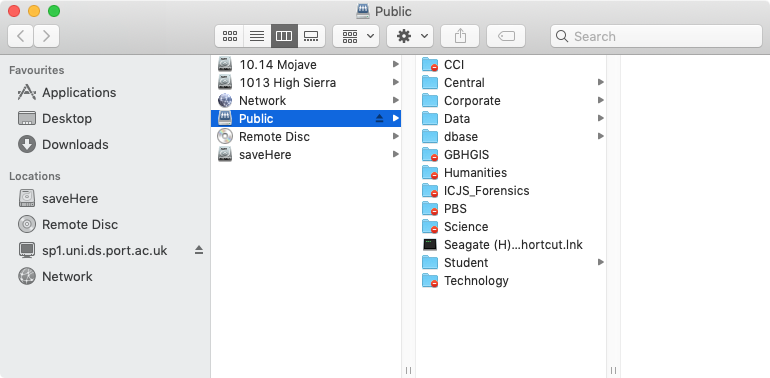
1. From the Finder menu, choose Go then Connect to Server...

2. Enter the path smb://sp1.uni.ds.port.ac.uk/Public

3. You can use the plus button to add the path to your favourite servers. Then click Connect
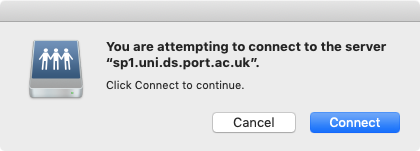
4. You may be presented with a connection warning, click Connect
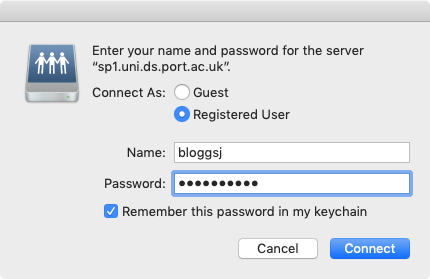
5. Enter your University username and password when prompted, if you would like to remember the login details, select the Remember this password in my keychain
6. The K: drive will appear in a Finder window once connected
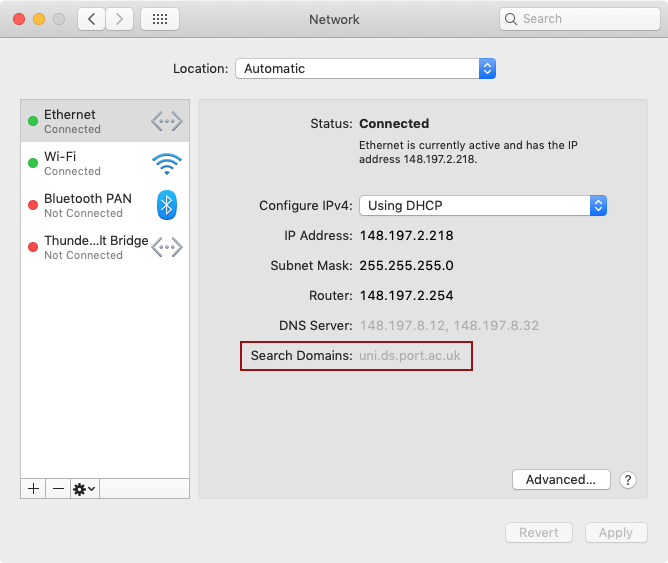
There should be no need to configure search domains but if you are experiencing an issue connecting to your drives on a Mac, you can check the search domains have been detected and add them manually if not.
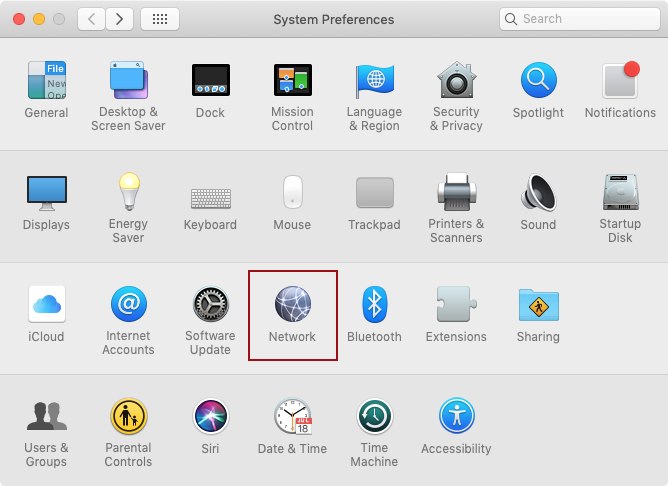
Choose System Preferences from the Apple menu, then choose Network.
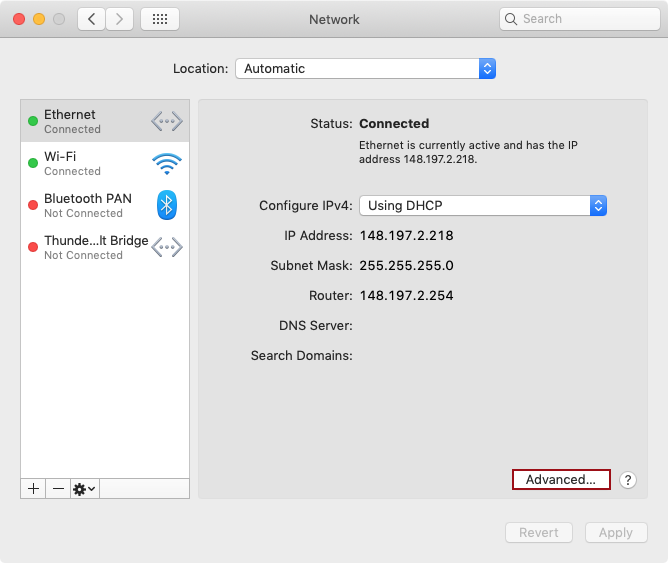
Choose the connection you use to access your N: or K: drive (normally Automatic), if the Search Domains is populated with uni.ds.port.ac.uk you do not need to do anything further.

If the Search Domains is empty, click the Advanced button then choose the DNS tab.
Enter the search domain uni.ds.port.ac.uk in the panel on the right-hand side using the button, then click OK to save the settings – you may be prompted to enter your admin password.
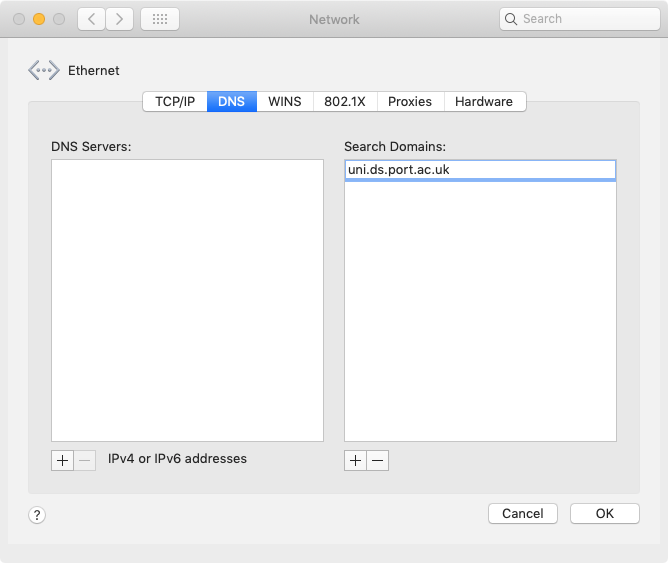
Once you have returned to the Network pane, the Search Domain should now be populated. Press Apply and close System Preferences.
Turn on notifications for critical updates like closures, safety alerts, and urgent service disruptions.


