Image

Outlook is the University’s email and calendar service for all students. It integrates with Microsoft 365 so you can manage messages, events, and tasks in one place. All students will use Outlook exclusively for all email and scheduling.
Note: “Outlook” refers to both the email and calendar apps.
To access Outlook navigate Outlook.com and sign in with your University credentials. You will need to set up MFA when using Microsoft for the first time, instructions can be found on this article.
For more information on the move to Microsoft please visit the Your move to Microsoft article.
Your email account is the main method of communication in the University, so make sure to check it regularly.
There are security policies in place across Microsoft 365 to protect staff, students and University services from malicious attacks such as phishing and malware, suspicious links and unsafe file types.
If an email is blocked or held for review, Microsoft will send you a quarantine notification. This allows you to review certain messages, delete them, or request release where appropriate.
Instructions for both methods are provided below.
Below is a screenshot of how quarantined messages will be shown in your inbox.
If you take no action the emails will be deleted after 15 days.
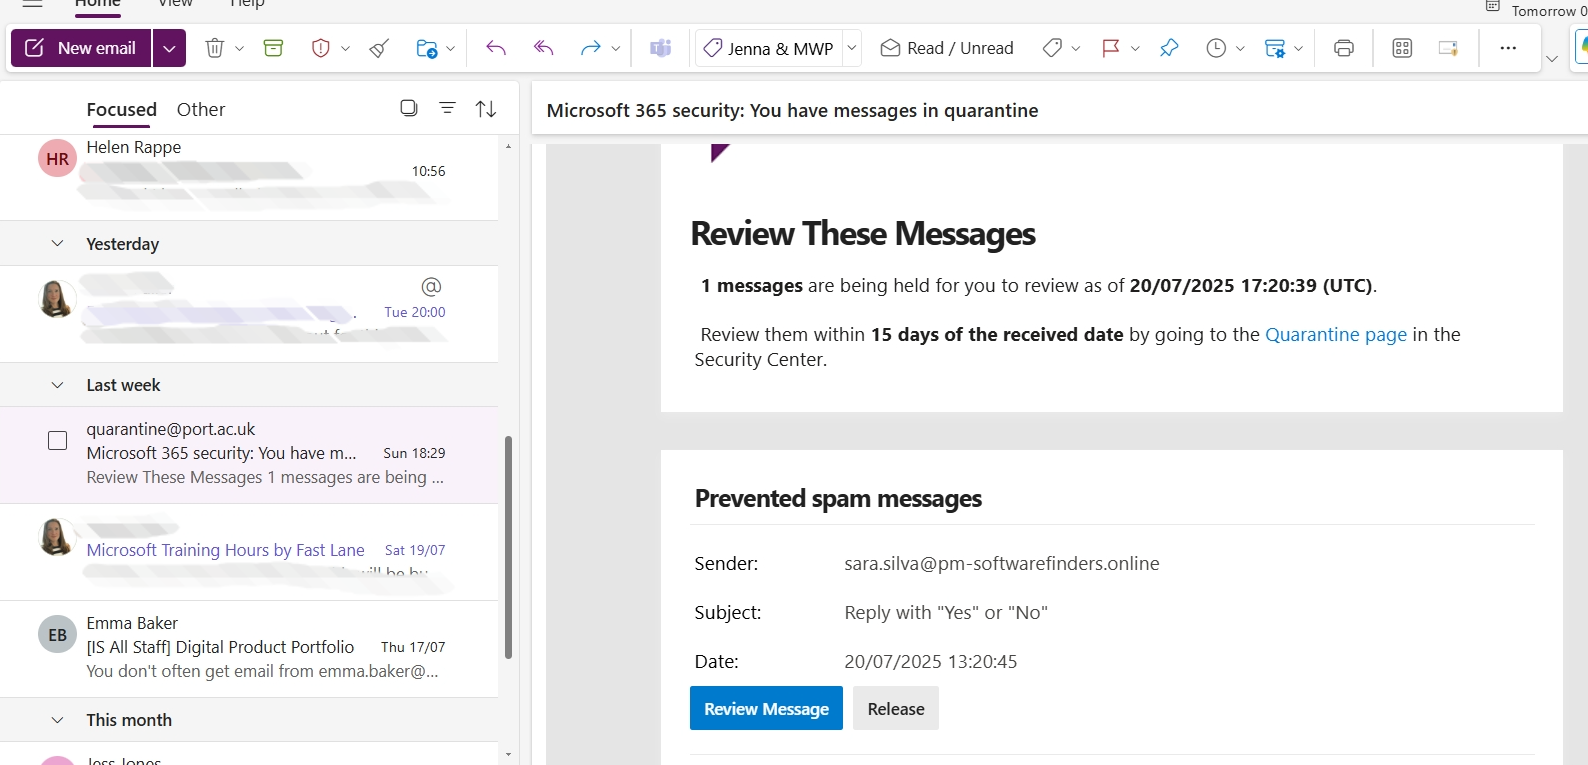
Some emails cannot be released directly. If the email is considered high-risk, selecting ‘Release’ will submit a request for admin review instead.
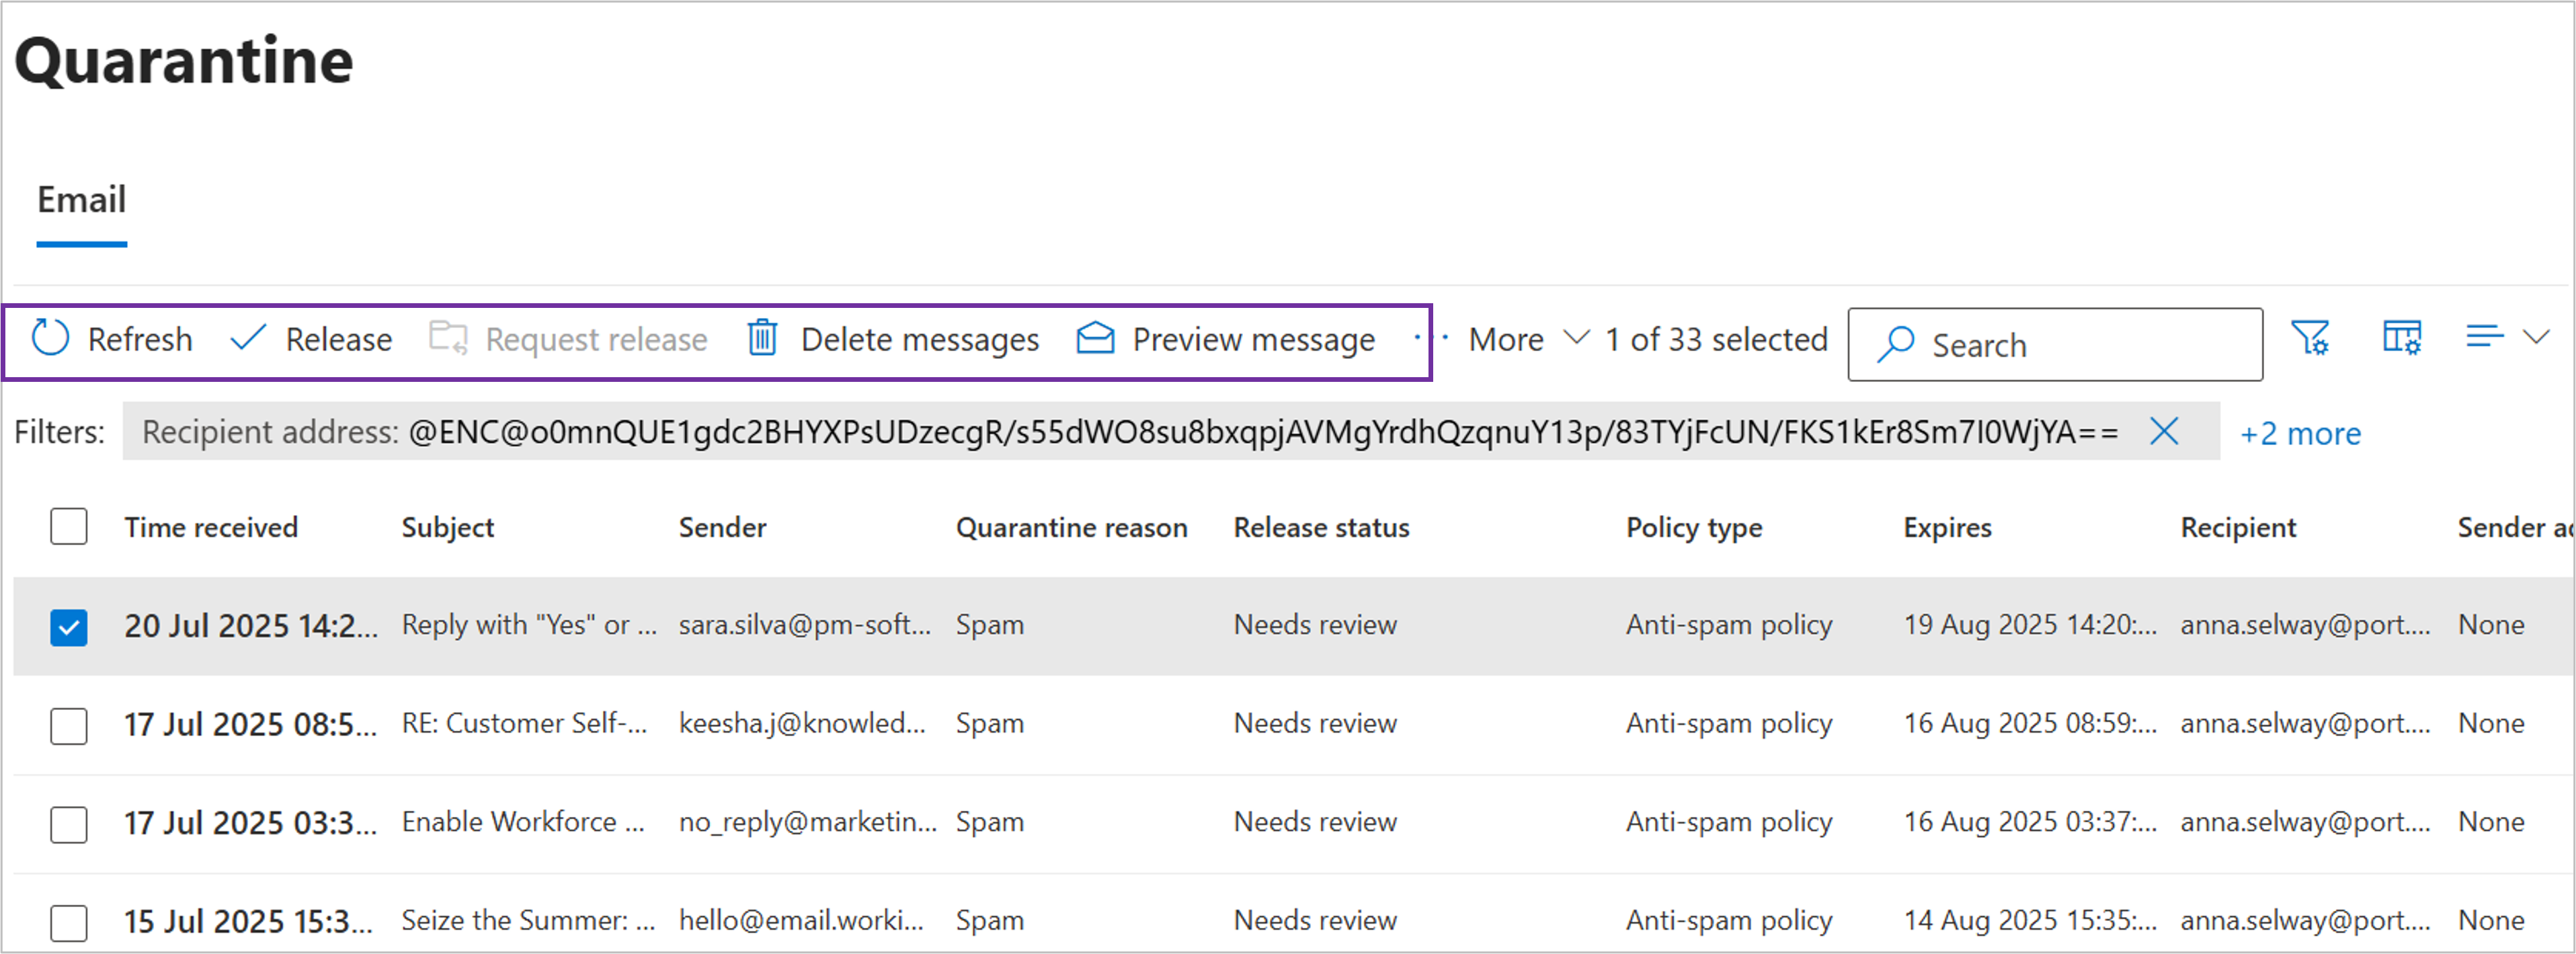
You can also check your quarantine folder at any time by following these steps:
Some quarantined emails can be reviewed and released by you. However, emails identified as high-risk (such as high-confidence phishing or malware) cannot be released directly.
In these cases, selecting Release will submit a request for admin review, and the email will only be delivered if approved.
Outlook now provides clearer warnings to help you spot suspicious emails. Emails that appear unusual or potentially harmful may:
These warnings are designed to help you make an informed decision before replying, clicking links, or opening attachment
Some file types can’t be sent as email attachments, including executable and script files. If you need to share these files, please use OneDrive instead.
Links in emails, Teams messages, and Office documents are now checked at the time you click:
Follow these instructions to report a suspicious email. There is no need to contact the Service Desk separately.
*Please note: There is no way to customise the order the options are displayed in Outlook.
Outlook has AI embedded that will alert you if you don't normally get mail from someone so that you can then take more time to assess that email in case it is a phishing email.
Once you receive a few emails from that address then the message will disappear.
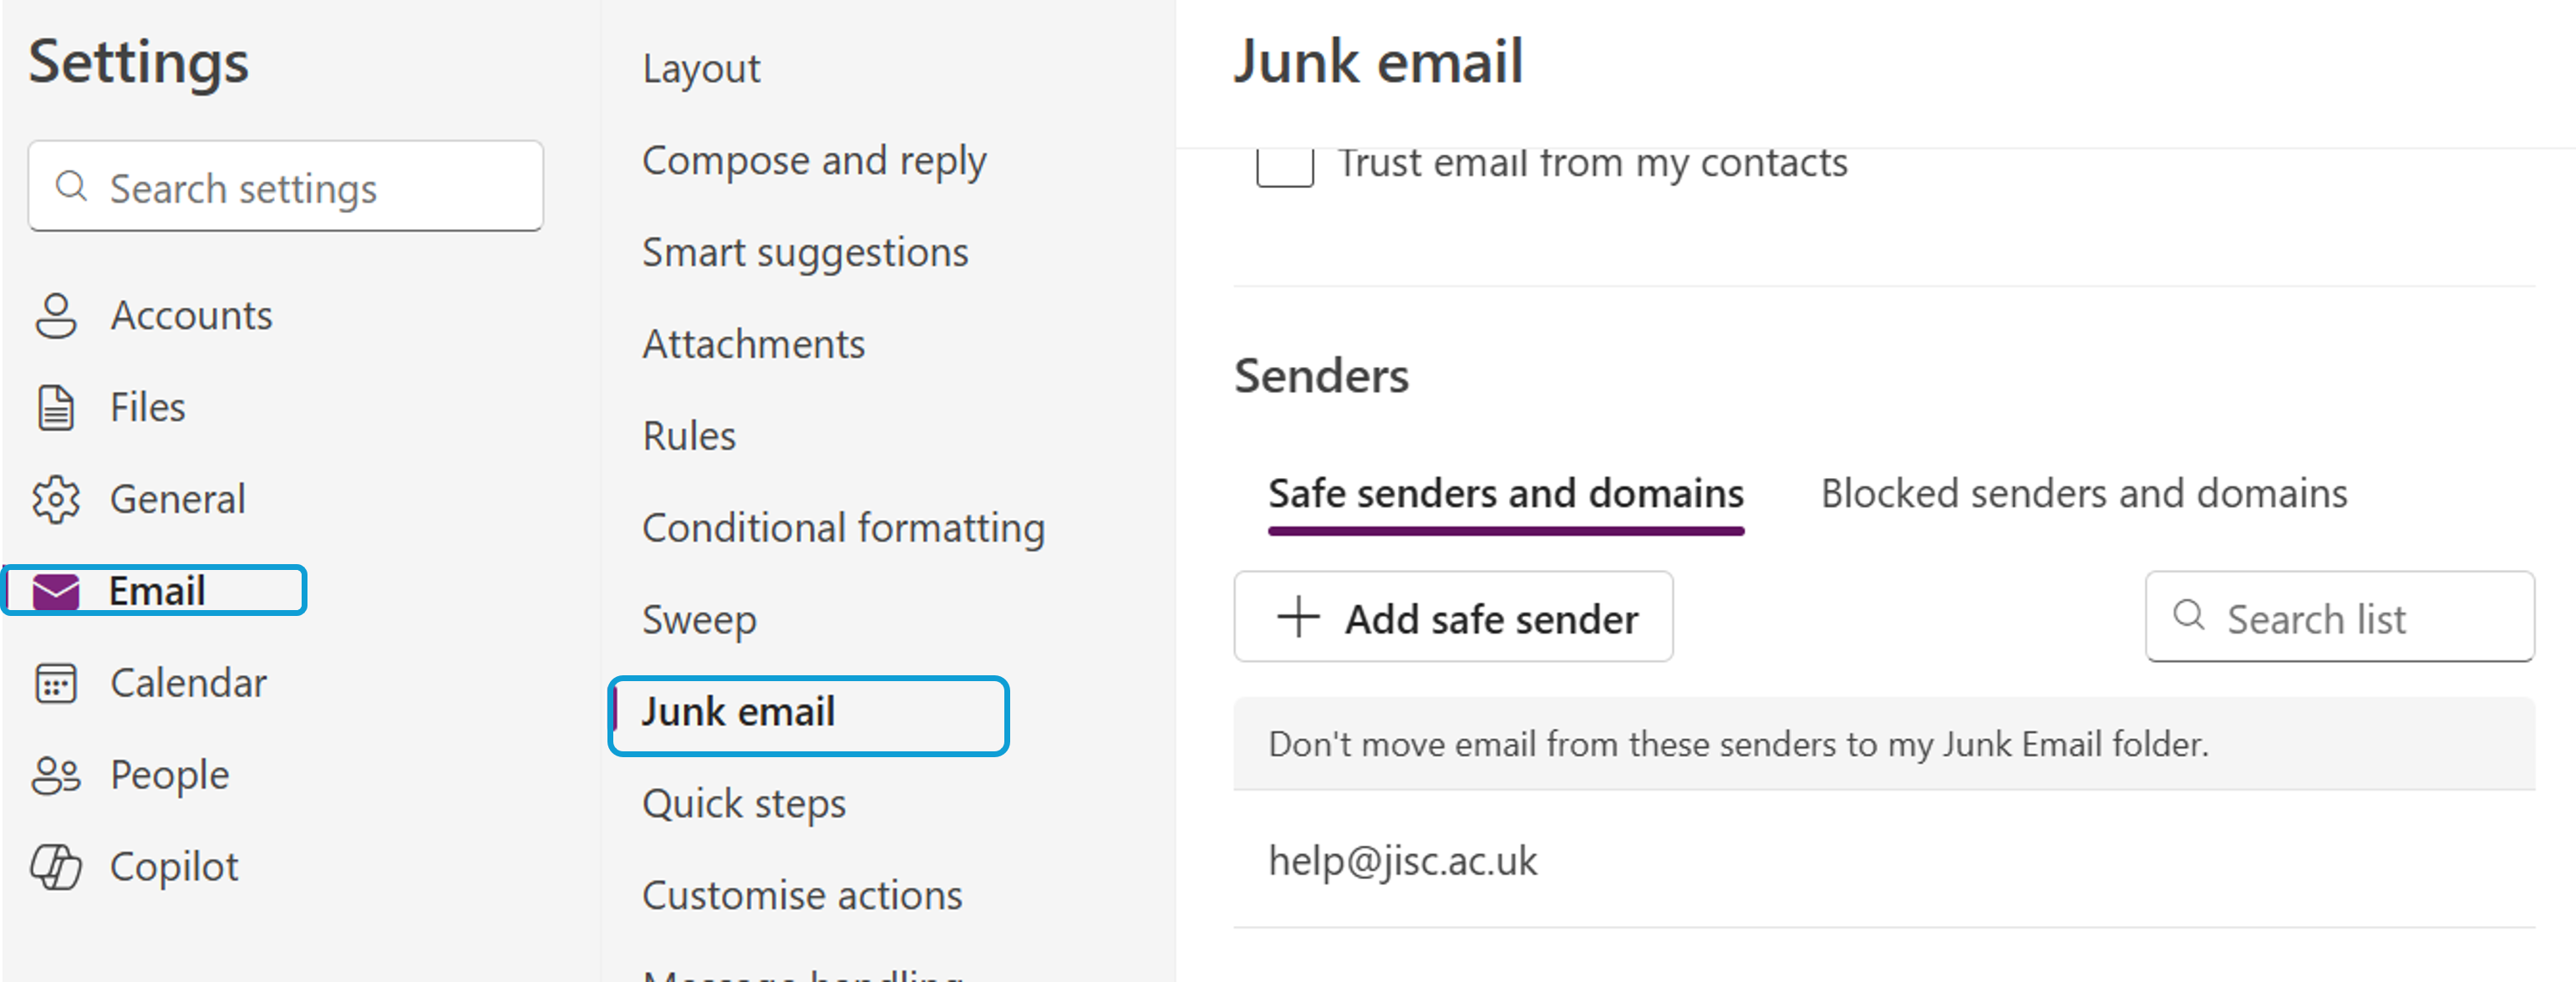
If the email is from an external account you will see this prompt when you open the email

Select Trust Sender to view the email. The email will then be placed in your Trusted Sender list which is available by selecting Settings (cog), select Email and then Junk Mail.
If you are unsure whether an email is genuine, you can report it directly as phishing or junk from Outlook please see the information in the Reporting emails section in this article . This helps improve protection for everyone and means you do not need to raise a separate Service Desk ticket for suspected phishing.
Below are instructions to help you resolve issues you maybe experiencing using Outlook
If you’re joining the University for the first time, activate your University student account and then gain access to your Microsoft Outlook email account by following these steps:
1. Find your student number (it will be a seven digit number)
You’ll find this in the application email sent to your personal email address.
2: Activate your University Network Account
If you haven’t already done so, activate your student account to generate your University username and password.
Your username will look like: up1234567 (“up” followed by your student number)
3: Log into your Microsoft Outlook email account
Sign in to Outlook.com using your University email address and password.
Your email address will be: [email protected] (up followed by your own student number)
Your password is the same as the one you set up in step 2
Reset if you've forgotten your password
4: Set up Multi-Factor Authentication (MFA)
On your first login, you’ll be prompted to follow the instructions to set up MFA.
5: Need Help?
If you need any support please contact IT support.
If you're not receiving emails in your Outlook mobile app, one common reason could be that your university email account is set up as a Google account instead of a Microsoft account.
⚠️ Note: These steps may vary slightly depending on your device (iOS or Android) and app version.
If you are a continuing student your email account will have be migrated from Google Mail to Microsoft Outlook.
To access Outlook:
If you need any support please contact IT support.
For more information please visit Your move to Microsoft for more information.
To help you make the most of Outlook, we offer free, on-demand courses through LinkedIn Learning. Whether you're new to Outlook or looking to improve your skills, these courses are designed for students.
Outlook Essential Training
Learn the basics of managing emails, scheduling meetings, and using the calendar in Outlook.
Outlook Calendar Tips and Tricks
Discover how to organize your academic schedule, set reminders, and manage meetings with tutors and peers.
Visit LinkedIn Learning via the University portal.
Log in with your University credentials.
Search for the Outlook courses and start learning at your own pace.
These courses are a great way to boost your productivity and stay organized throughout your studies.
This section guides you through setup tasks to complete when you first start using Outlook
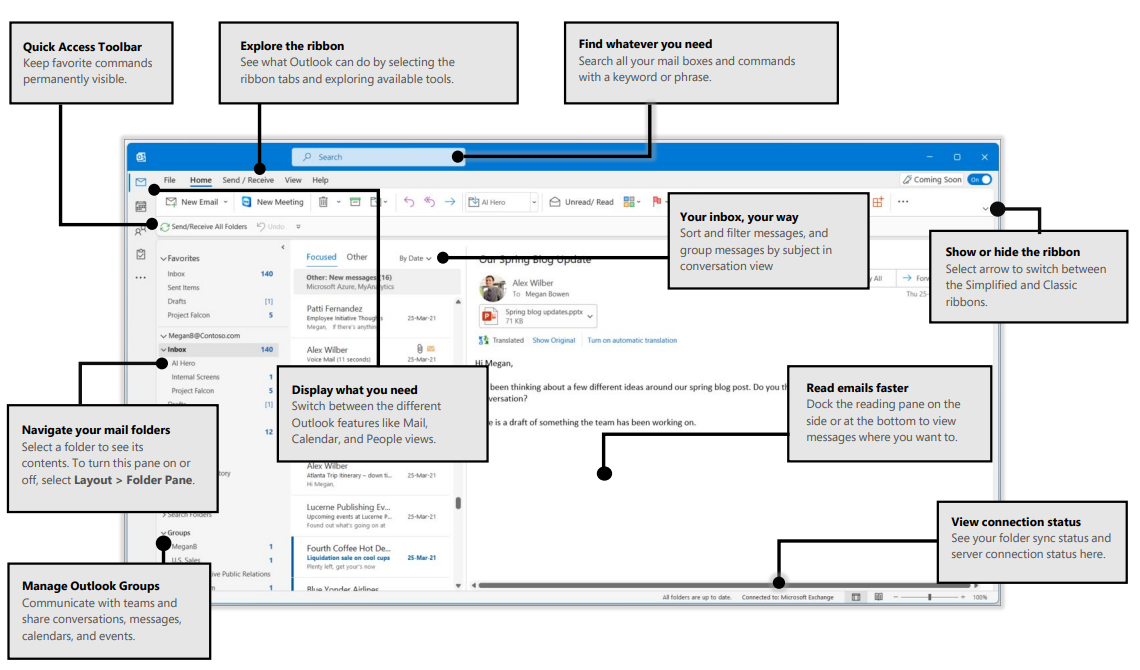
Image from Microsoft Quick Guides
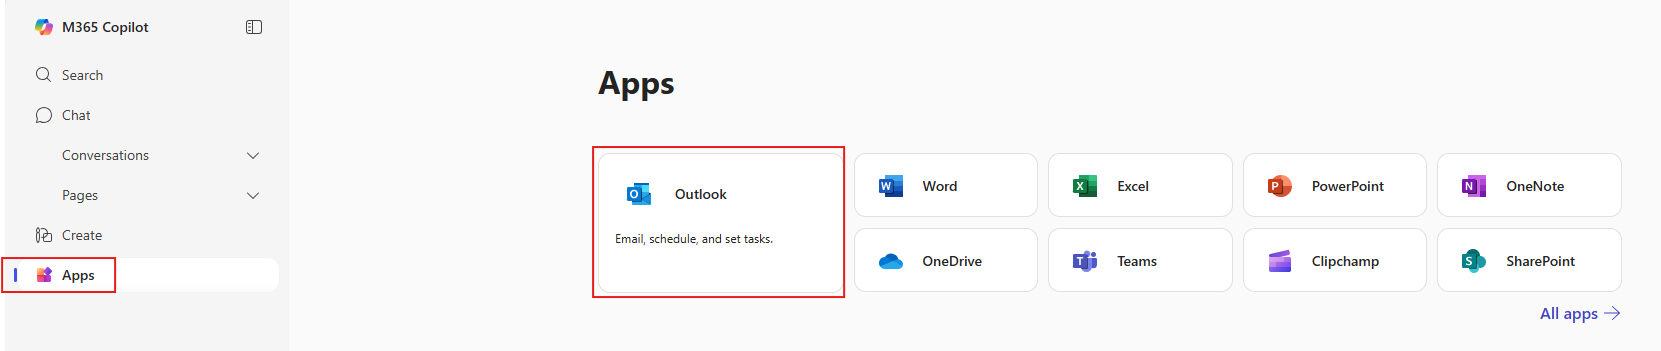
You can access Outlook directly from your web browser. This is the quickest way to open and manage your email and calendar online.
To open Outlook on the web:
Open your internet browser (Edge, Chrome etc).
Go to www.office.com.
Sign in with your University credentials.
Select Apps from the left-hand menu.
Click Outlook from the list of available Microsoft 365 apps. This will open in a new browser tab.
If you need any support please contact IT support.
The Outlook app is the easiest and most secure way to check your University email and calendar on the go. It works on iOS and Android and lets you keep your academic life organised. You can even add your personal accounts so everything’s in one place.
⚠️ Only use the official Microsoft Outlook app for your University email. Other email apps may not work correctly.
If you’re a continuing student who has used the Outlook app before, you may find that new emails are not appearing. This usually happens because the app is still connected to your old Google account instead of your University Microsoft 365 account. This can cause issues such as:
To fix this, you just need to remove the Google account by following the steps below.
In the Outlook app, open Settings and choose Mail Accounts.
Below your email address, if your old Google account is listed, select it and choose Remove Account.
Once removed, select Add Mail Account and sign in with your University credentials.
Return to your Inbox, then pull down to refresh so your emails sync.
Notifications in Outlook are alerts that inform you about new emails, calendar events, tasks, and other updates. These notifications can appear as pop-ups, sounds, or badges on the Outlook icon, helping you stay informed about important activities and messages.
Tip: After making changes to your Outlook settings, it's a good idea to close and reopen the application to ensure the updates take effect properly
You can add your CMIS Go academic timetable to Outlook in two different ways. The option you choose changes how your timetable appears in Outlook and how others see your availability when scheduling meetings with you.
You can use both options together. Subscribe from the web to keep track of any timetable changes, and import the file into your main calendar so that others see you as “Busy” during those times.
Please review the instructions below for each option.
.ics).From here, choose one of the following options:
.ics file onto your device..ics file.
From 16th June 2026, Focused Inbox will be switched off, bringing all emails into one inbox view. To restore the Focused and Other tabs, you can turn this feature back on using the instructions below.
If your inbox now appears busy, tools such as Sweep and Outlook Rules can help you quickly organise messages.
Focused inbox is an Outlook feature that separates your inbox into two tabs:
Outlook uses your email activity and interactions to decide how messages are sorted. It automatically filters messages based on:
Over time, built-in Outlook intelligence will improve as it learns your preferences. You can further refine sorting manually:
Note: When using a Focused inbox, it is important to review all messages in both the Focused and Other tabs regularly.
A Focused inbox can be turned on or off, depending on how you prefer to work with your messages. To switch the layout, follow the following steps:
Drafting and sending an email in Outlook is simple and efficient. Additionally, Outlook offers enhanced formatting options, including the ability to insert tables and check accessibility.
Note: If you cannot see all the options mentioned above, click on the ... at the end of the ribbon.
An email signature is a short block of text that appears automatically at the end of your messages. In Outlook, you can create and add a signature to include your name, contact details, or other information each time you send an email.
Please note: There is no way to customise the order the options are displayed in Outlook.
Flagging emails identifies emails that are important or that need follow up actions by a date.
The Sweep feature in Outlook is a tool designed to help you quickly manage and organise your inbox by automatically handling emails from specific senders. It provides several options for dealing with unwanted or less important emails, making it easier to keep your inbox clutter-free.
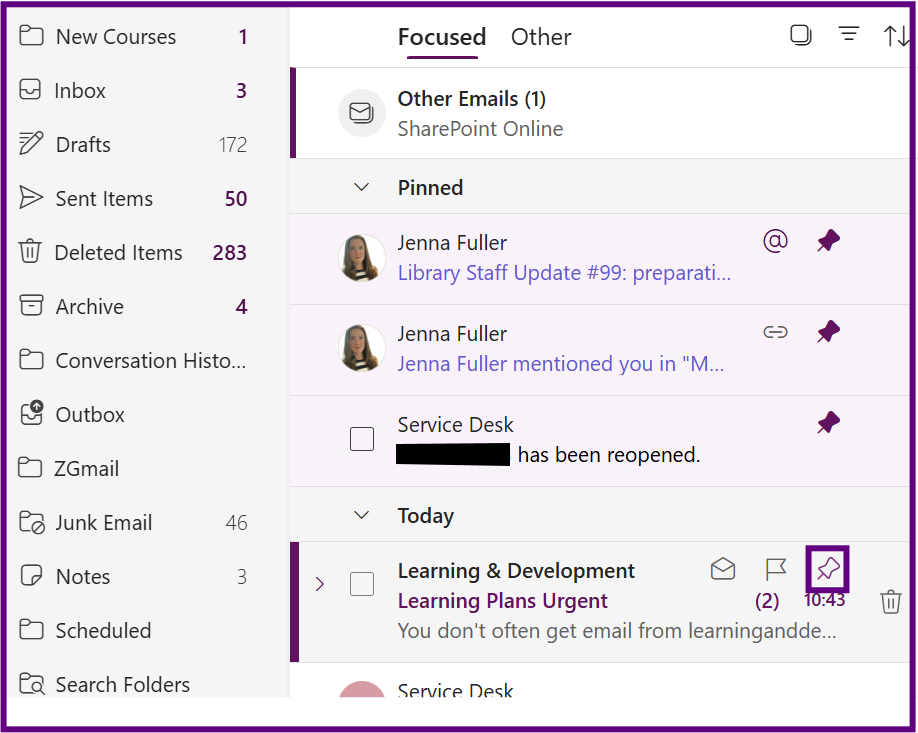
A pinned email is a message that has been marked to stay at the top of your inbox or folder for easy access. Pinning is typically used to highlight important emails that you want to keep visible, such as reminders, key information, or ongoing conversations. Unlike regular emails that move down as new messages arrive, pinned emails remain fixed in place until you choose to unpin them.
Folders can be created which will help you organise your emails.
Note: emails can only exist in one folder.
Open Outlook.
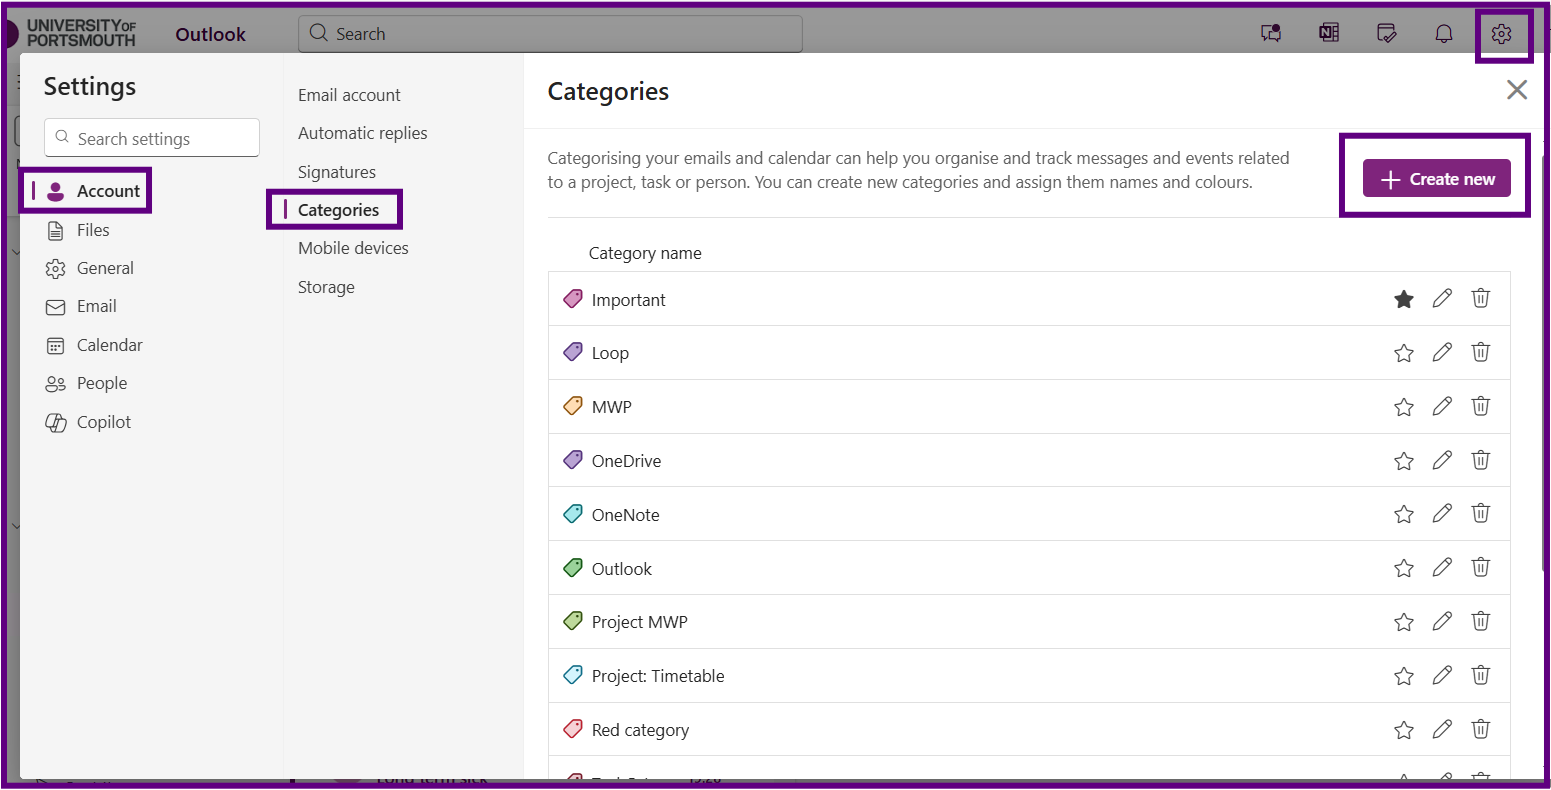
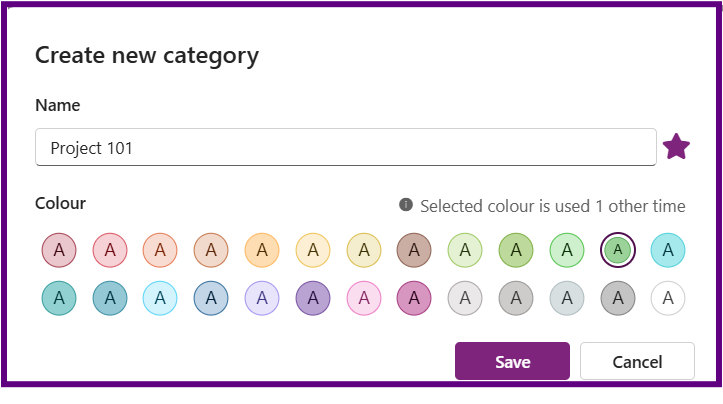
In Outlook, categories are labels you can assign to emails, tasks, and calendar events to help organise them by themes or topics. You can apply multiple categories to a single item, making it easier to sort and find related items later. Categories can be customised with different colours and names to suit your needs.
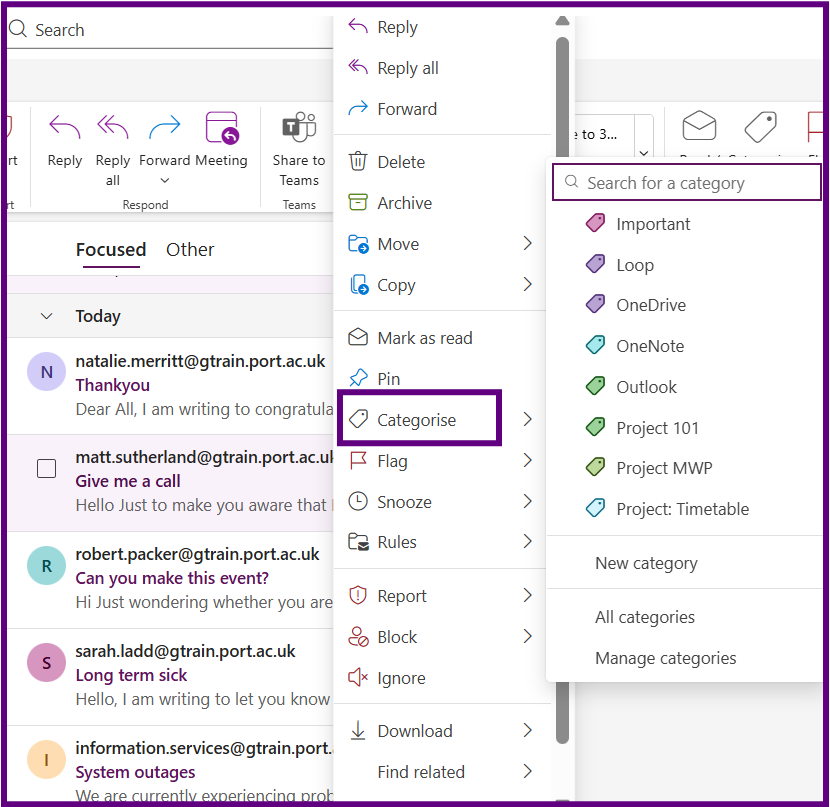
Note: Emails can have multiple categories, but they can only exist in one folder at a time.
Search Folders in Outlook are virtual folders that provide a view of all email items matching specific search criteria. They don’t move or duplicate emails but offer a convenient way to access categorised or filtered messages. The instructions below show to create a Search Folder for categorised emails:
Sorting and filtering emails in Outlook can help you manage your inbox more efficiently.
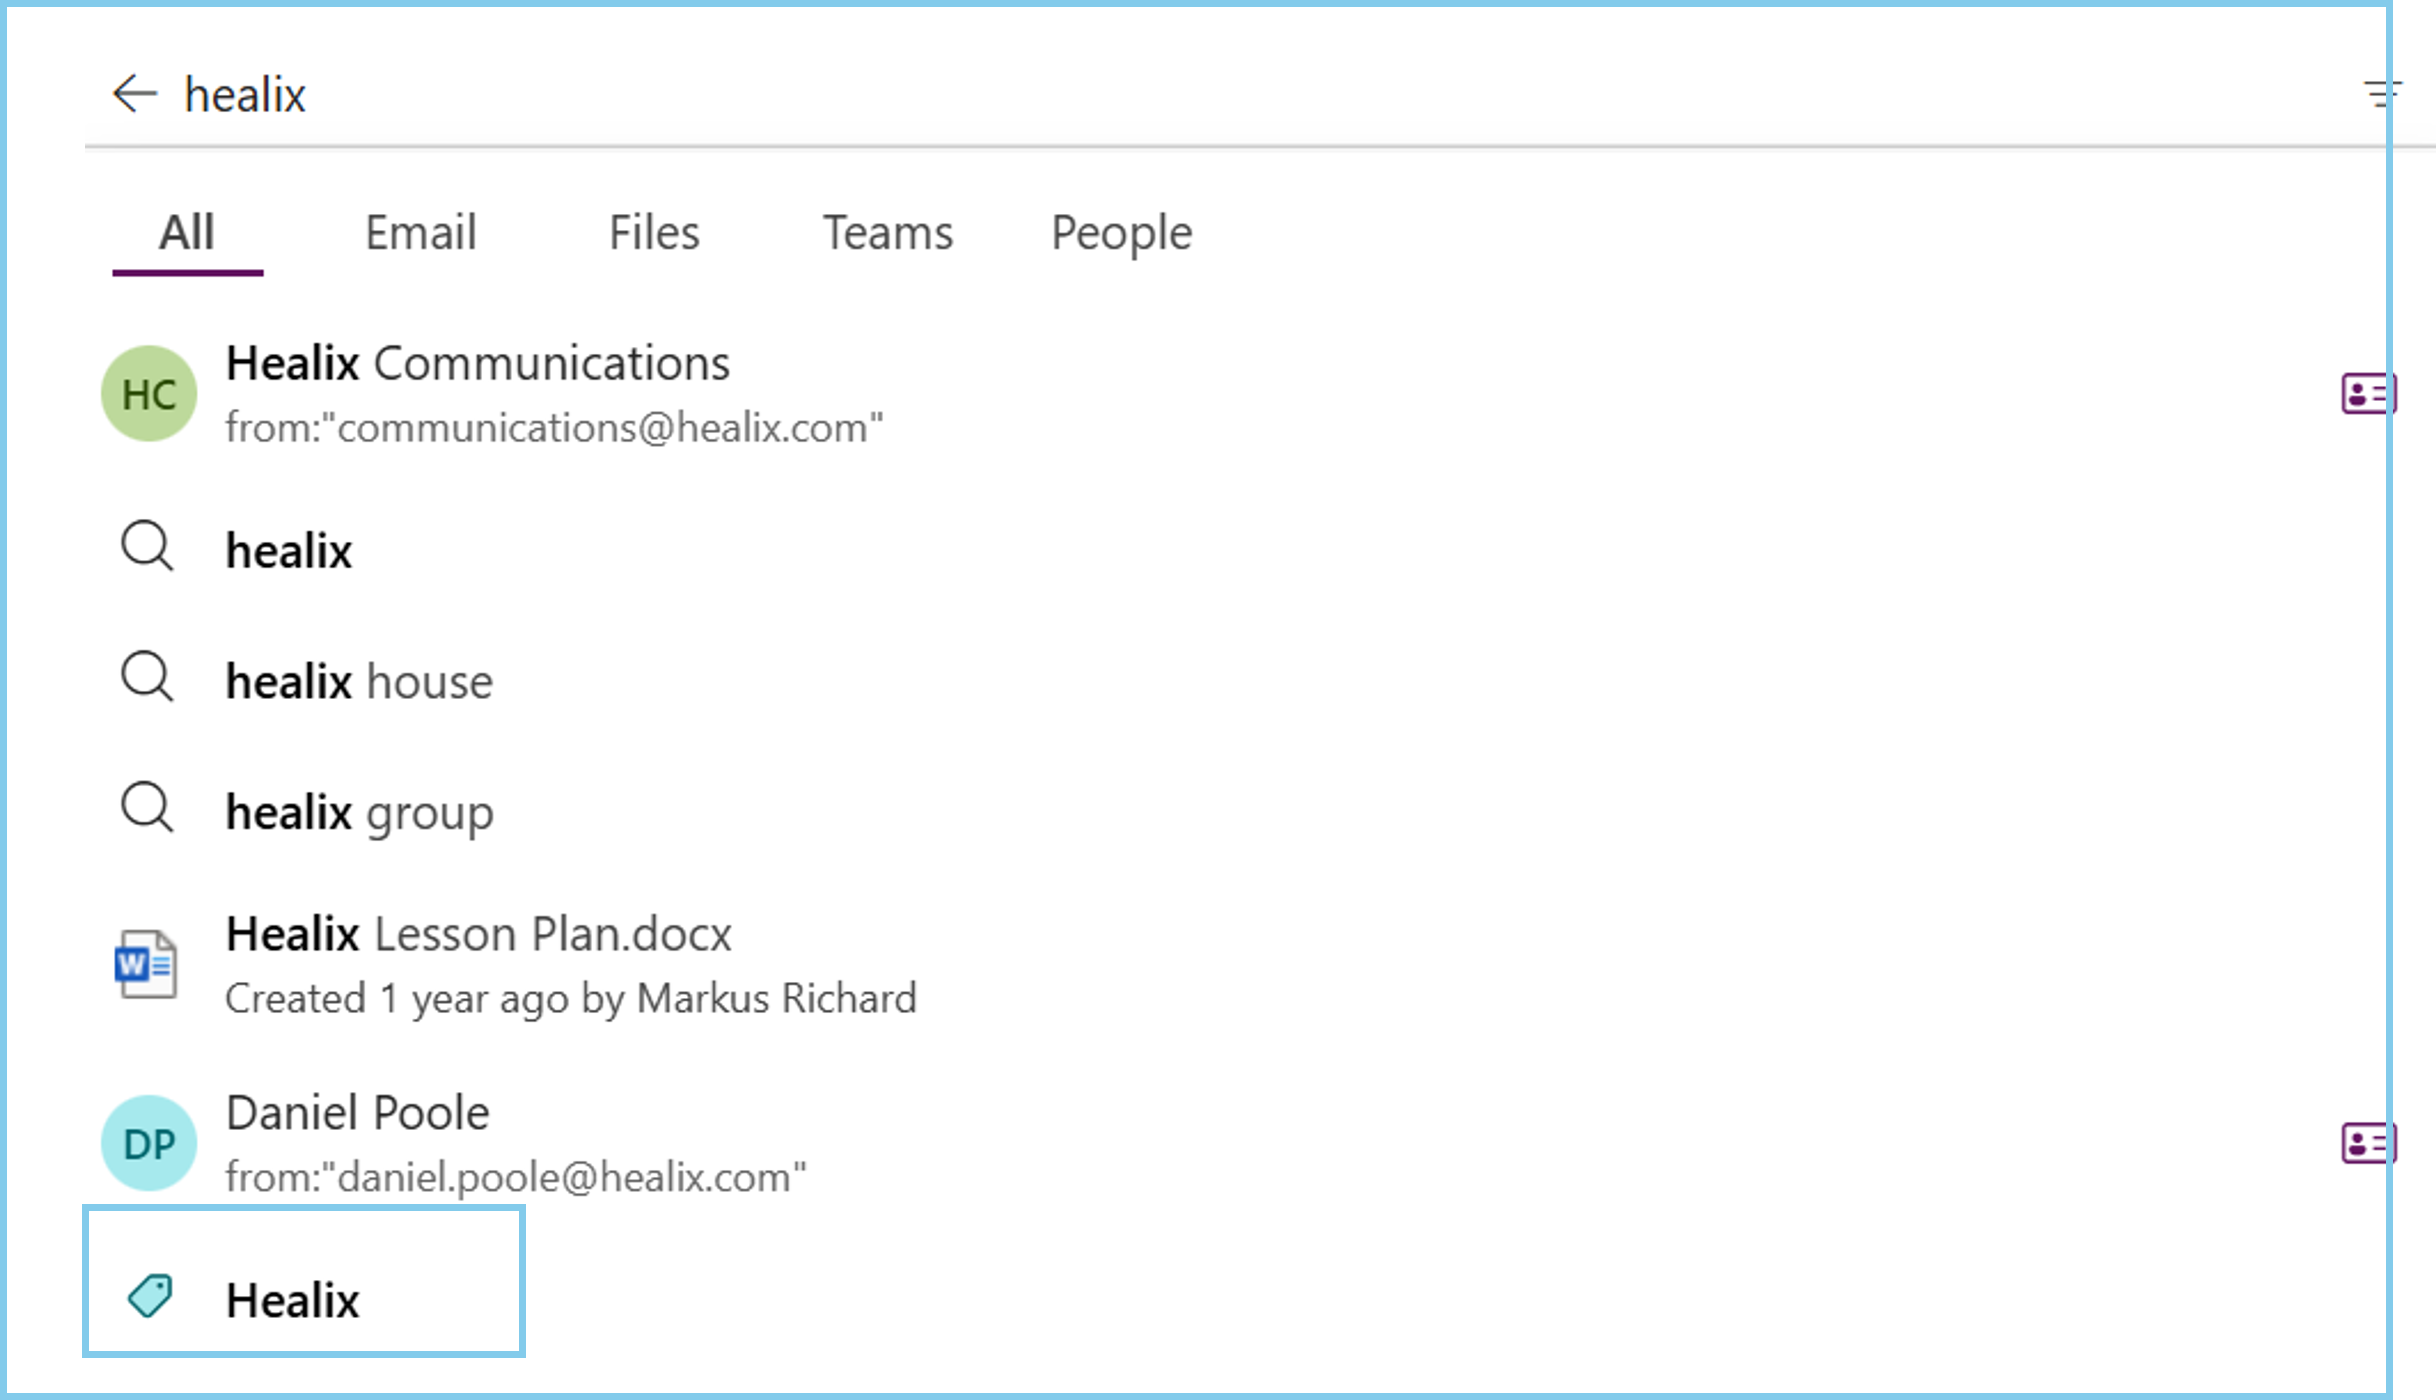
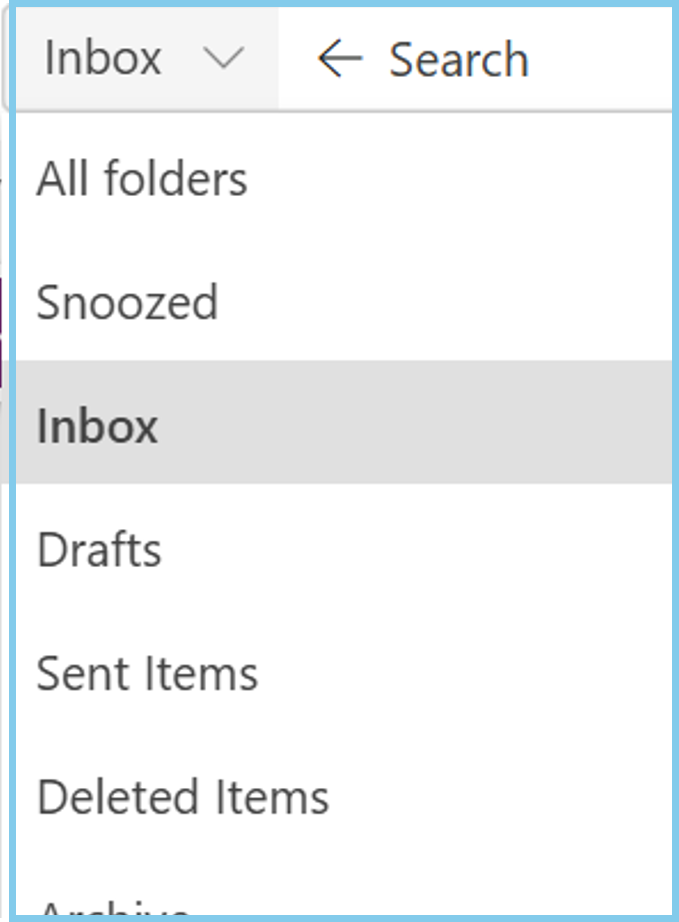
By default when you search using the Search bar, Outlook will search all folders .

If you select the dropdown arrow you can limit the search to a particular folder (note the dropdown will show all the folders you have created but not sub-folders).
Outlook has AI embedded that will alert you if you don't normally get mail from someone so that you can then take more time to assess that email in case it is a phishing email.
Once you receive a few emails from that address then the message will disappear.
If the email is from an external account you will see this prompt when you open the email
Select Trust Sender to view the email. The email will then be placed in your Trusted Sender list which is available by selecting Settings (cog), select Email and then Junk Mail.
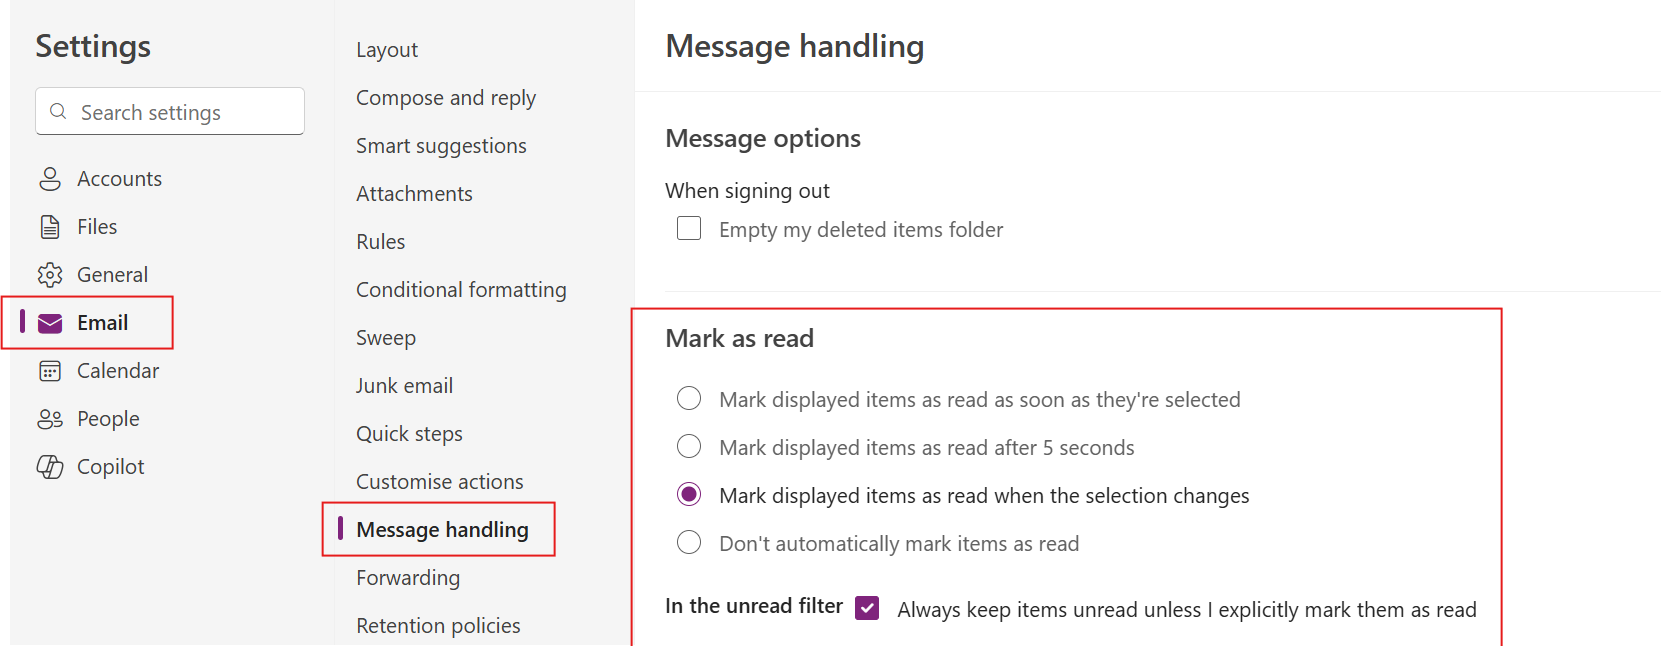
If you open an email and move it to a new location, such as a folder, before it has been marked as read, Outlook will continue to display it as unread in the folder. This can lead to confusion about how many unread or outstanding emails you actually have.
To prevent this, you can change when Outlook marks emails as read in the Reading Pane.
Select the Settings icon in the top-right corner.
Click Email, then select Message handling from the left-hand menu.
Under Mark as read, choose one of the following:
Mark displayed items as read as soon as they're selected (recommended if you want emails marked read instantly)
Or choose another option, like after 5 seconds or when the selection changes
(Optional) Untick Always keep items unread unless I explicitly mark them as read if it’s enabled.
When you first open Outlook, the default layout may show only the list of emails without a reading pane, where the message content is displayed alongside the inbox. You can enable the Reading Pane so you can preview emails without opening them in a new window.
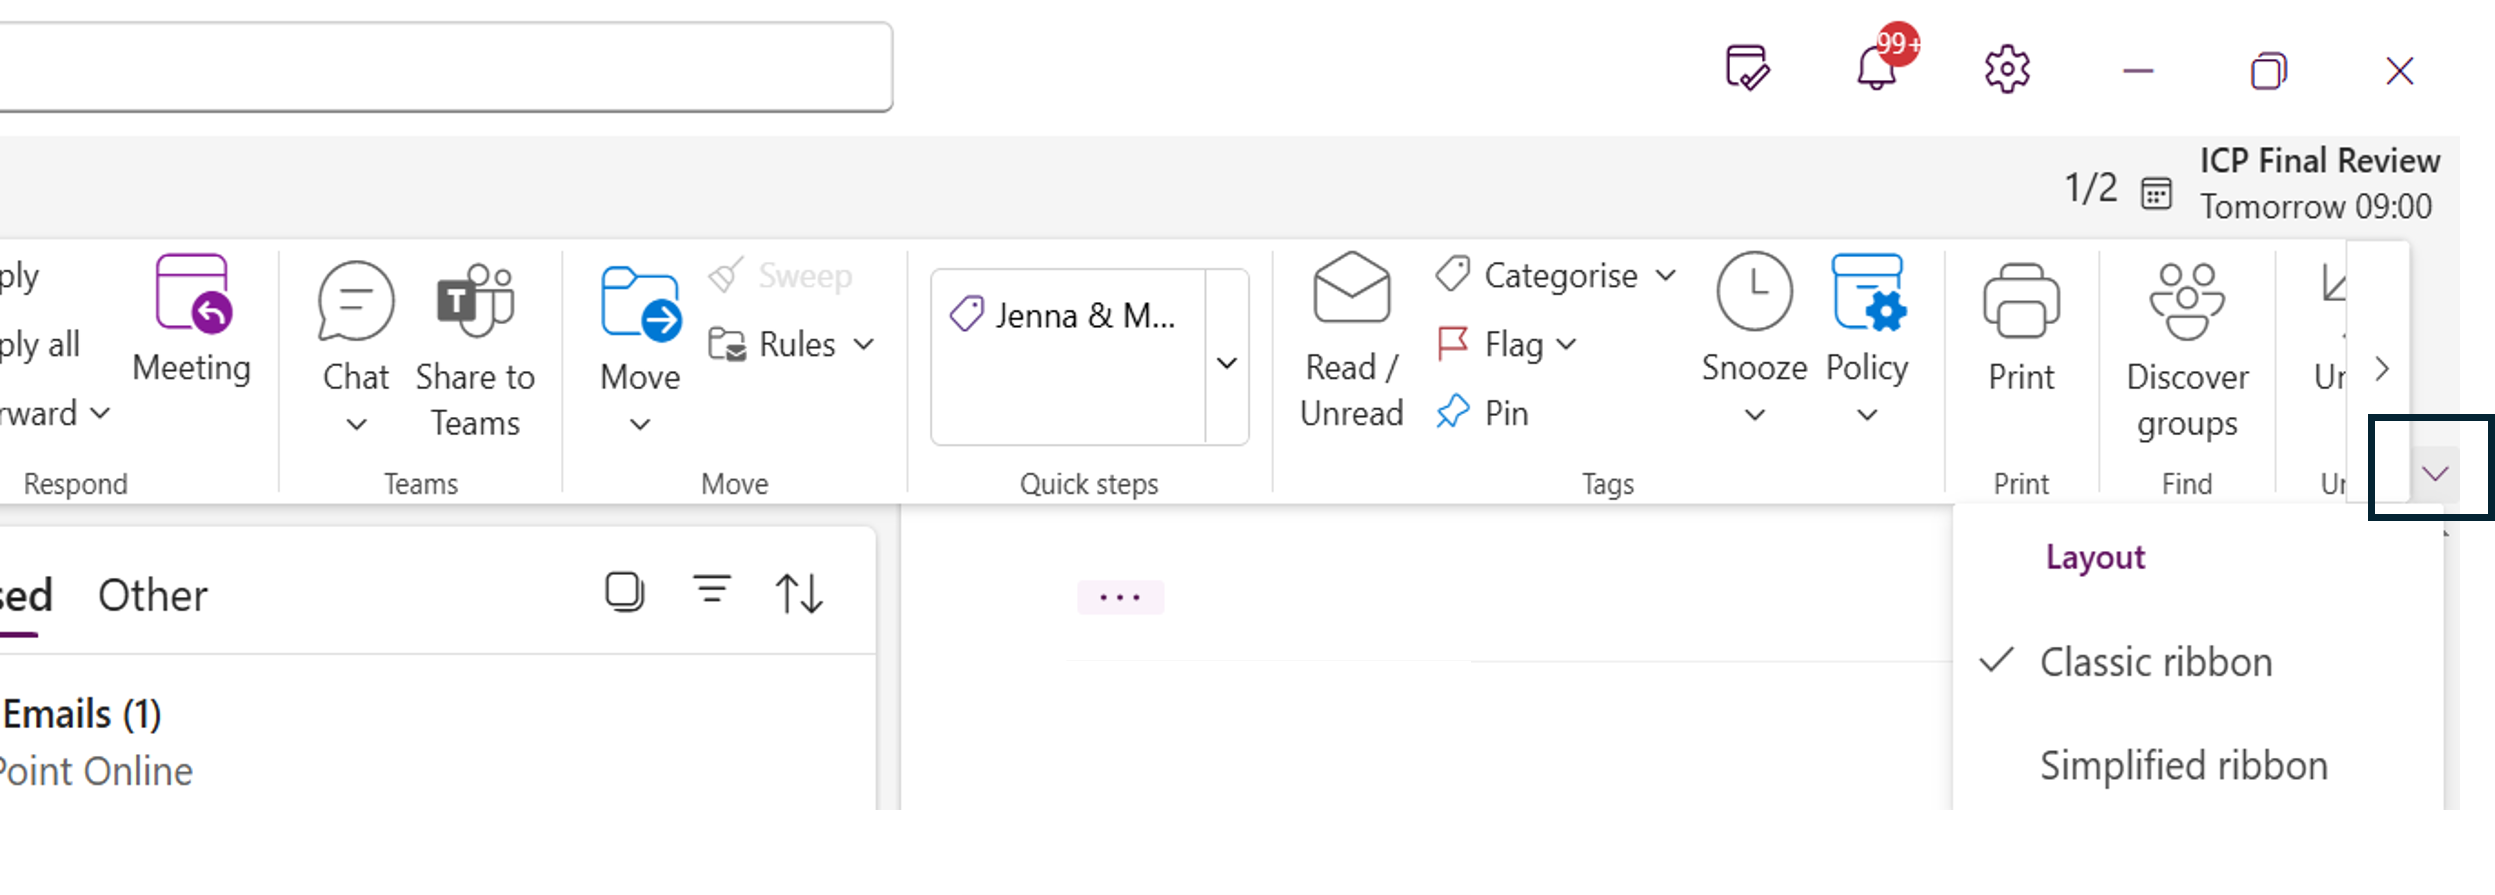
Outlook offers two toolbar display options, Classic and Simplified allowing you to choose the layout that best suits your working style.
In Microsoft Outlook, emails become minimised into tabs at the bottom of the window when you open multiple messages or items (like emails, calendar events, or tasks) in separate windows. This feature has been designed to reduce window clutter and make multitasking within Outlook more manageable.
If you would like to share a calendar follow the instructions below;
In Outlook Calendar, you can easily check when your peers or staff are available. This is useful for arranging group work, tutorials, or meetings with lecturers.
When creating an event in Outlook, use the Scheduling Assistant to see each person's free/busy times. This helps you find a time that works for everyone without needing to message back and forth.
All students and staff using Outlook can see each other’s free/busy information, making it simple to arrange meetings.
In Outlook, an event is a calendar entry used to block out time for activities such as meetings, appointments, or focused work. Events help you manage your schedule and coordinate with others by reserving time and sharing availability.
These instructions will guide you through the process of creating a new event in Outlook, including how to fill out the event details, use the scheduling tools, and customise event settings to suit your needs.
This will start by completing the Event Options section, followed by an overview of the Event Toolbar and the Scheduling Assistant, a powerful feature that helps you find the best time for your attendee.
The Event Toolbar at the top also displays options:
The Scheduling Assistant in Outlook is a powerful tool designed to help you find the best time for meetings by checking the availability of all attendees.
When you register for an external event (for example, a webinar or conference), you will often see an option to "Add to calendar". To ensure the event appears correctly in your Outlook calendar, follow the steps below.
Turn on notifications for critical updates like closures, safety alerts, and urgent service disruptions.


