Windows 10 is the latest operating system from Microsoft and will be found on the majority of the University's PCs and laptops.
This guide will cover everything you will need to know to get started with Windows 10.
Signing in
- If needed, power on the PC or laptop.
- The University lock screen will display. Click on the lock screen to start the sign in process.
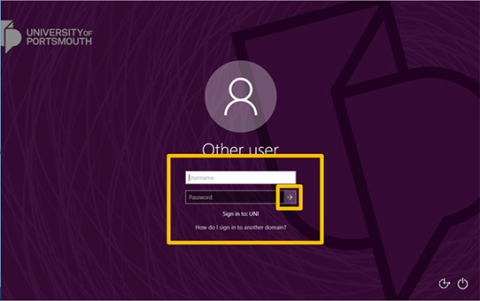
- The sign in screen will display, type in your University username followed by your University password.
- Press Enter on your keyboard or select the arrow on your screen to sign in.
- Your desktop will be displayed.
Signing out
It is important that you sign out when you have finished using the PC or laptop. If you don't sign out the next user will have access to your files and any services you have logged into.
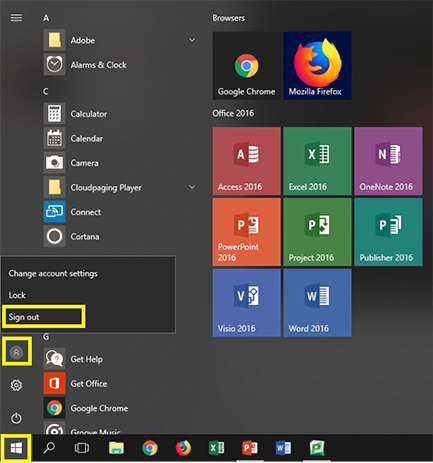
- Select the Start Menu icon which can be found at the bottom left of your screen.
- Select the Account icon, a context menu will appear.
- Select Sign out.
Shutting down or restarting
If you wish to shut down or restart the machine please follow these instructions:
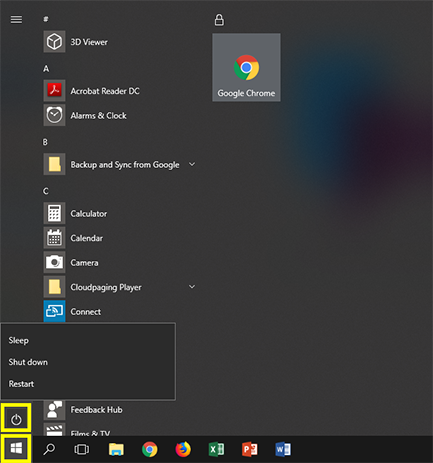
- Select the Start Menu icon which can be found at the bottom left of your screen.
- Select the Power icon, a context menu will appear.
- Choose to Shut down or Restart the machine.
Locking your PC or laptop
If you need to leave the PC or laptop you are using unattended, even for a few seconds, it is important to lock the device. If you do not lock the device it would be very easy for someone to access and compromise your network account, files and any online services that you are logged into.
Method 1
- Press the Window key and the L key on your keyboard together.
- The University Lock screen will appear and your device will be locked.

Method 2
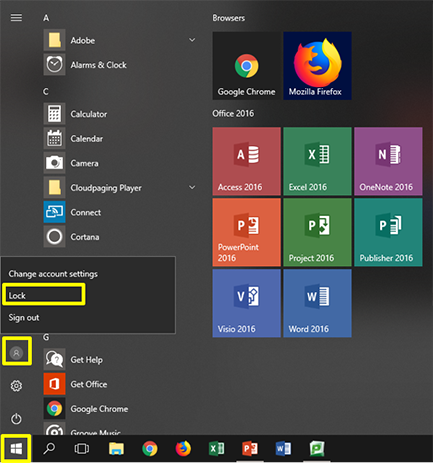
- Select the Start Menu icon which can be found at the bottom left of your screen.
- Select the Account icon, a context menu will appear.
- Select Lock. The University Lock screen will appear and your device will be locked.
Unlocking your PC or Laptop
- Click on the screen, the sign in screen will appear.
- Type in your password and press enter on the keyboard.
Locating programs and applications
1. Select the Start Menu icon.
2. The Start Menu will be displayed.
3. If the program you require is displayed as a tile, select the tile to open it.
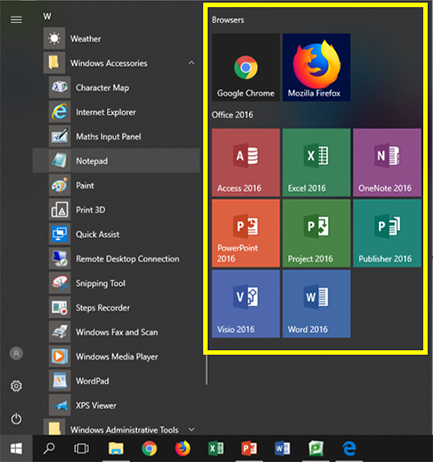
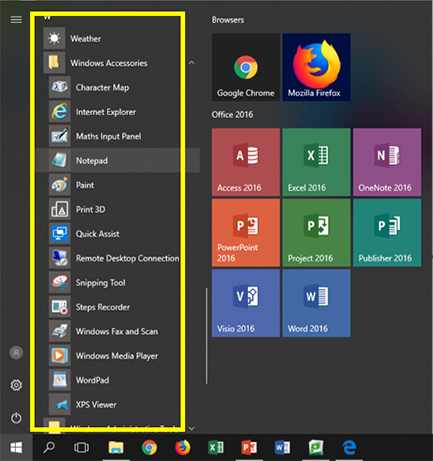
4. If the program is not displayed as a tile scroll through the All program and applications list and select the program you wish to open.
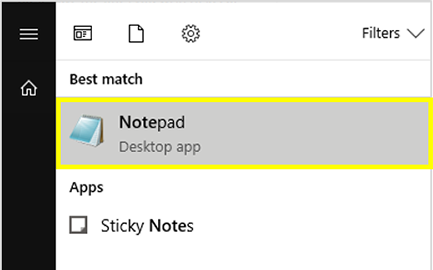
5. Alternatively select the Start Menu icon or Search Windows icon and start typing the name of the program or application you wish to open.
6. When the program or application name appears at the top of the start menu select it to open.
Programs and Applications
Windows 10 PCs and laptops will have Microsoft Office and a range of Internet browsers installed. Additional programs and applications are available through the AppsAnywhere store.
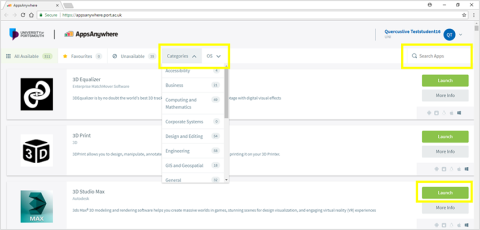
1. Double click the AppsAnywhere shortcut which is located on your desktop.
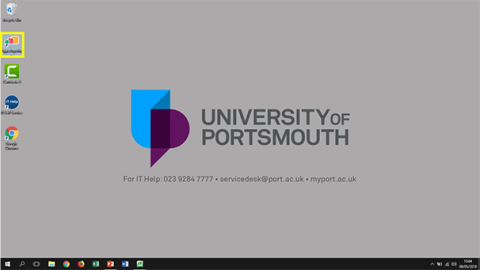
2. AppsAnywhere will validate and open.
3. Use the filters and search facility to locate the program you want to use.
4. Select the launch button to open the program.
Printing
All students receive £10 of printer credit at the start of the academic year, please see the linked articles below for more information about printing.
Black & White and Colour Printing
The University uses a system called Pull Printing.
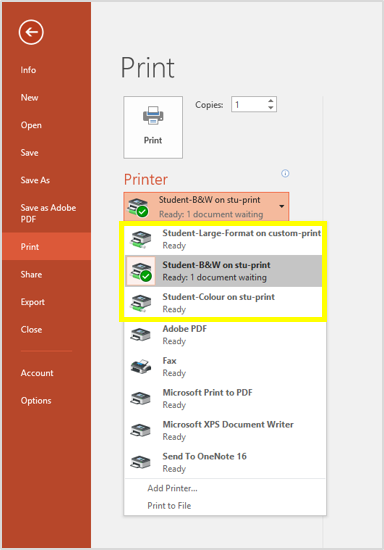
- When you print a document you will have the choice of Black and White (Student-B&W), Colour (Student-Colour) or Large Format (Student-Large-Format). Please see the instructions below for large format printing.
- Your black and white and colour prints will be held in a queue for 24 hours. The documents will be printed when you swipe your card over a card reader on a student printer.
- To cancel a print job, log into myprint.port.ac.uk.
If you have any problems with printing, please visit IT Help desks for support.
Large Format Printing
- To print to the large format printers, choose student-large-format when you print.
- Ask an IT Helper in the Library Open Access IT Suite to release your large format printing.
File explorer and saving your work
We recommend that you save your work to your N Drive. The N Drive is your personal network storage area which you will be able to access from all standard build PC's or Mac's on campus. Your N drive has a 20 GB storage capacity.
In addition to this storage,you also have access through your G Suite for Education account to Google Drive.
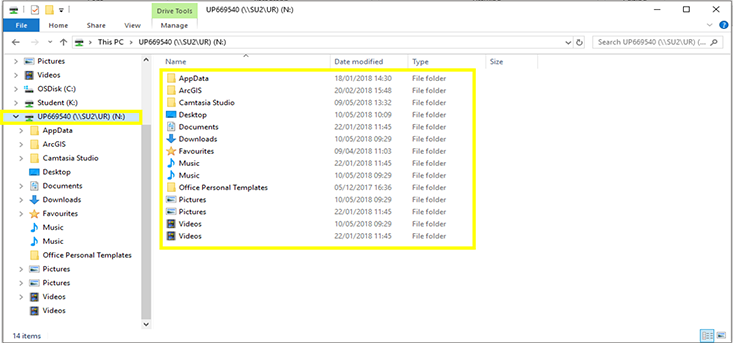
- To view your N Drive, open File Explorer by selecting the File Explorer icon which is located on your task bar.

- File Explorer will open, select you N Drive on the left, your N Drive will be called UPxxxxxx (N). The contents of the drive will appear on the right.
Task view
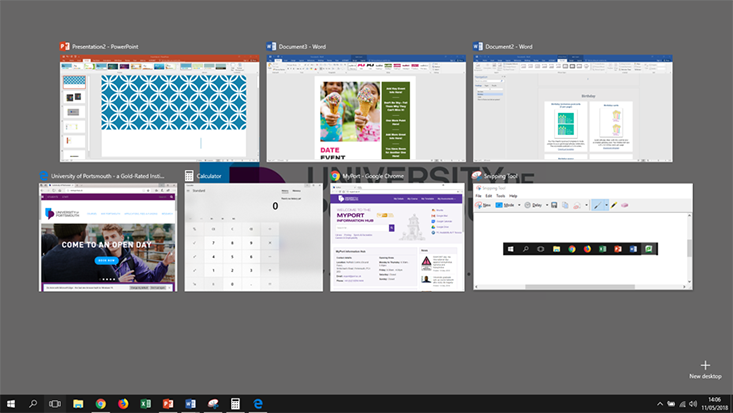
A new feature in Windows 10 is Task View. Task View will present all open windows as thumbnails.
- Select the Task View icon on the Taskbar.

- Task View will launch, showing thumbnails of all the windows you have open
- Select a thumbnail to make the window active.
For help regarding this article contact IT Support.

