Image

This guide focuses on connecting remotely using Microsoft Remote Desktop. You can access around 65 lab computers remotely and use any of the software installed on that computer, or via AppsAnywhere.
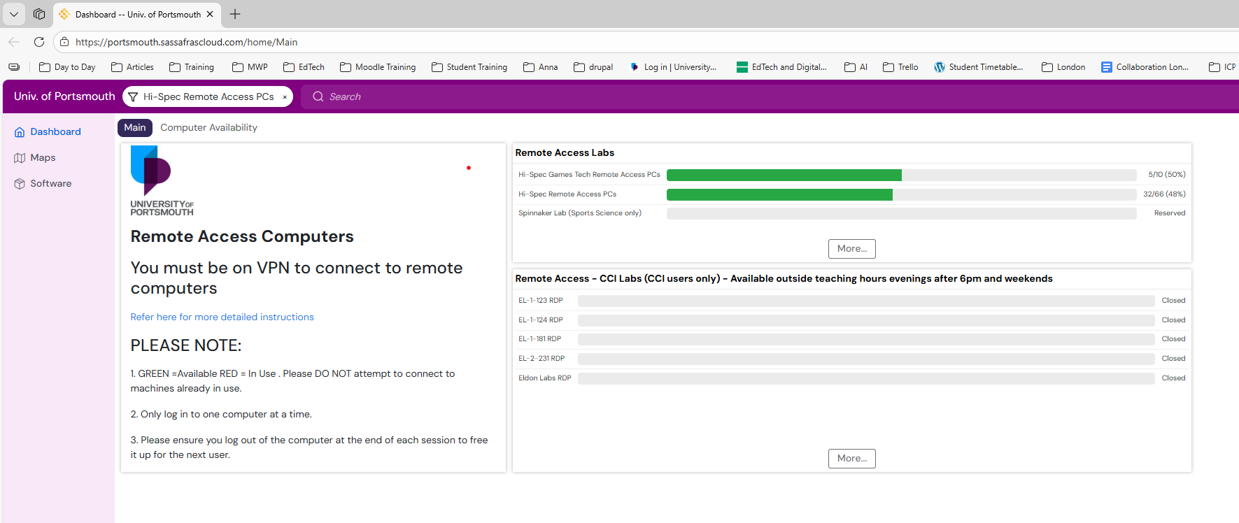
You must be connected to the VPN to use any of the remote labs.
When using a computer remotely:
Expand the sections below to view the instructions and additional information
Note:

Note: If you see a message saying the download may harm your device, select Keep to continue.

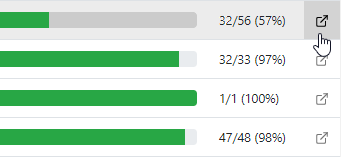
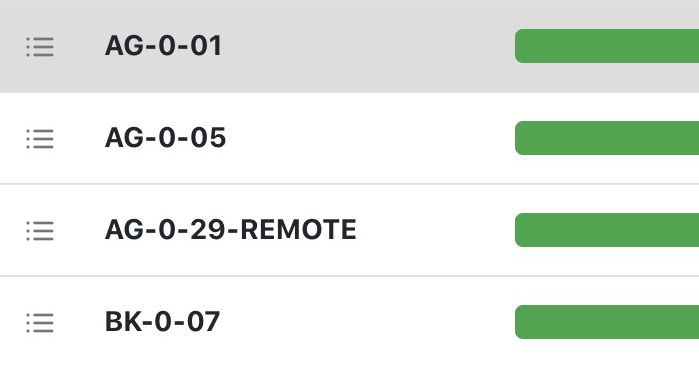
Note: Availability is shown as both a percentage and a visual progress bar. When the bar is full, there are no computers currently available.

This method requires access to the Android Play Store. You can find out if your Chromebook supports Android apps by visiting Google's support page for Chromium OS.
1. If you already have the Chrome OS Webstore version of Global Protect, please uninstall it by right-clicking or alt-clicking the application and selecting Uninstall.
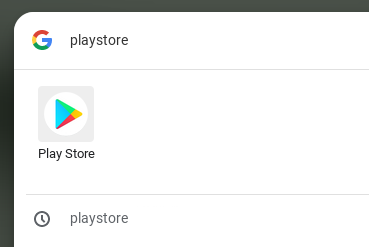
2. Open the Play Store from your applications.
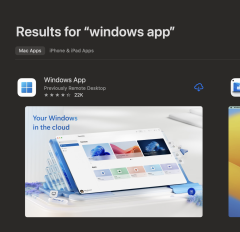
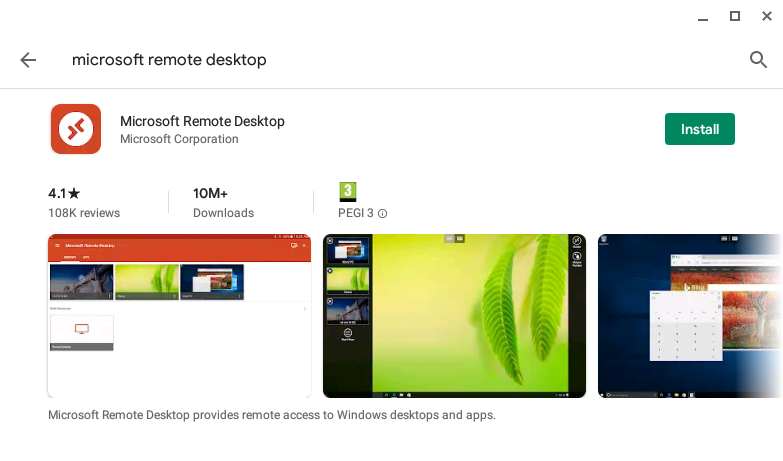
3. Search for Microsoft Remote Desktop, click Install to install the app.
4. Connect to the VPN.
5. Visit the Remote Access page from your web browser.
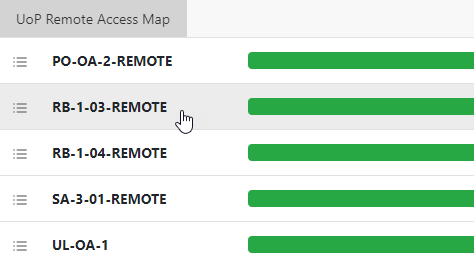
6. Each location name corresponds to the building and room number the areas is in, e.g. RB-1-03-REMOTE would be Richmond Building, room 1.03, please see the Key to look up building names. The availability of the area is shown by percentage and visually on the progress bar. When the bar is full there are no computers currently available.

7. Click the external link icon to the right of the location you would like to connect to, this will automatically choose an available computer.

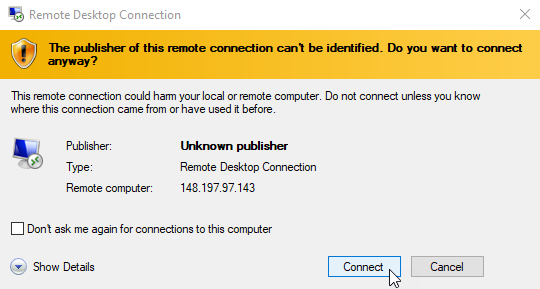
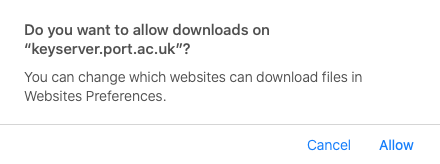
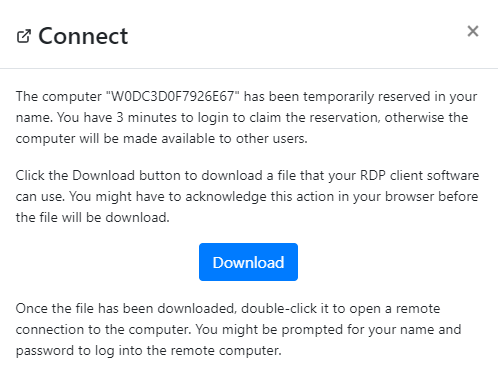
8. A Connect dialog window will appear, click Download to download the connection file.
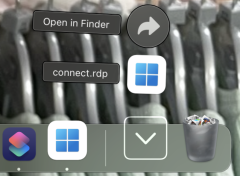
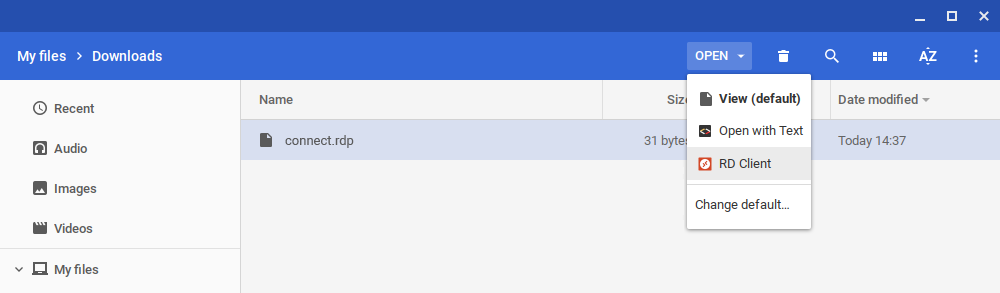
9. A connect.rdp file will download. Locate this file in your Downloads directory and select OPEN from the menu at the top, from the drop down menu click RD Client.
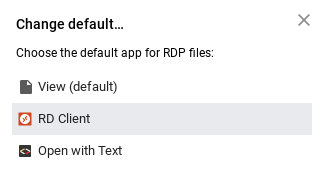
10. Optional step: You may wish to change the default program used to open .rdp files by choosing the Change default... option from the menu in your Downloads folder. Select RD Client from the options provided. Now you can double click any .rdp files and they will be opened in the RD Client by default.

11. When using for the first time, you may see a dialog box will ask you to accept agreements. Select Accept.
Microsoft Remote Desktop requires iOS 13 or iPadOS 13 to work.
1. Visit the App store and sign in if you are not signed in already. Download Microsoft Remote Desktop app from the App Store.
2. Open the Microsoft Remote Desktop app. It is called RD Client on the home screen.
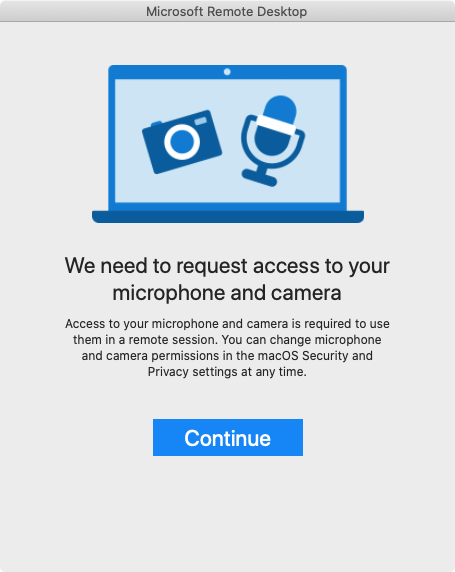
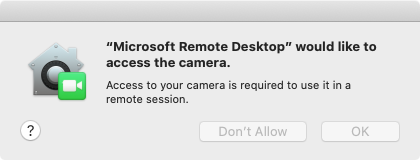
3. Request to the microphone, bluetooth and camera will be required. Click Continue on each prompt that appears.
4. Connect to the VPN.
5. Visit the Remote Access page from your web browser.
6. Each location name corresponds to the building and room number the areas is in, e.g. RB-1-03-REMOTE would be Richmond Building, room 1.03, please see the Key to look up building names. The availability of the area is shown by percentage and visually on the progress bar. When the bar is full there are no computers currently available.
7. Click the external link icon to the right of the location you would like to connect to, this will automatically choose an available computer.

8. Click the Download button to download the connection file.

9. Confirm you would like to download the connexion file but choosing Download.

10. Open your Files app, locate the connect file and tap to open. The file should open in Microsoft Remote Desktop connection.
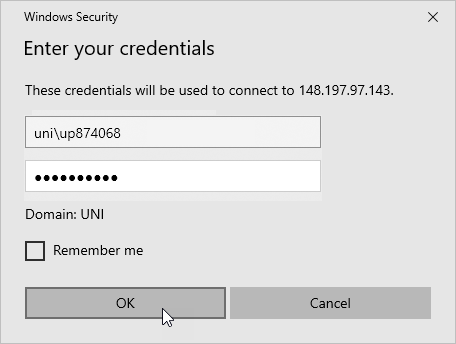
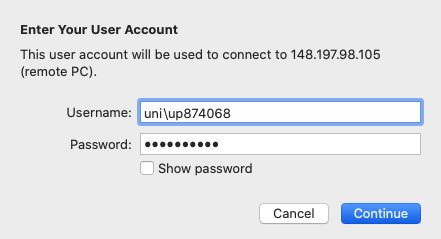
11. Enter your University username e.g. up874068 and password. The computer will log in.

12. To log off, click the Start button and select the Log off tile in the Start menu. You will be signed out of the computer and it will become available for another user.
13. If you wish to connect to a specific computer, you can choose the list option to the left of the location, then connect to a specific computer by choosing the Connect option next to the computer. You can use the filter at the top to only show available computers.
Expand the sections below to view the instructions and additional information
In order to run specialist software applications (such as matlab, opnet, and sage) from a PC in one of the two Linux labs A2.02 or A2.03, and be able to display the application on your personal computer, follow the steps related to your operating system.
As detailed in the diagram below, connect from your personal computer, through the gateway server, onto one of the machines in the specialist Linux labs. The diagram gives an example of the lab machines – see a complete list of lab machines you can connect to.
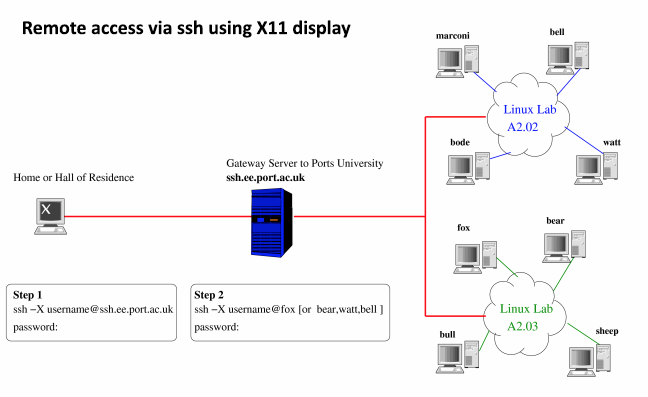
The lab machines are dual-boot, and automatically boot into Linux overnight, however, if the machine is switched off, or being used during the day by Windows users, you will not be able to connect to that specific machine and you may need to try an alternative machine.
These instructions have been tested on CentOS 7, Ubuntu 18.04, Windows 10, and Mac OSX Mojave.
To connect into the Linux system is a two stage process:
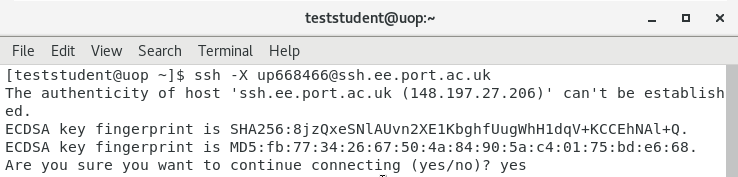
Open a terminal and connect to the gateway server using the following command, substituting username with your login credentials. Accept the fingerprint when prompted, followed by your password.
ssh -X username@hostname
You will now be able to launch your application from the remote PC, such as Opnet, which will display on your own machine.
Eg. Type in the name of the application you wish to run in the terminal window
example: [ opnet ] or [ firefox ] or [ matlab ] or [ sage ]
You can press the key sequence of CTRL +C to quit if there are any problems
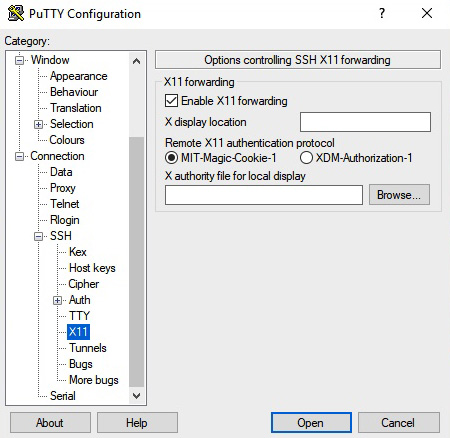
In order to connect into the Linux system using a Windows based machine you will need to have some extra software which will allow remote access to a Linux X11 window graphics environment. We recommend using the successfully tested graphical application called Xming, along with access software such as Putty.
Ensure that X11 forwarding is switched on to allow a display on the client Expand SSH from the menu on the left to show X11 Tick Enable X11 forwarding.
Connect to the gateway entry server Select Session from the menu on the left, and type ssh.ee.port.ac.uk in the Host Name field.
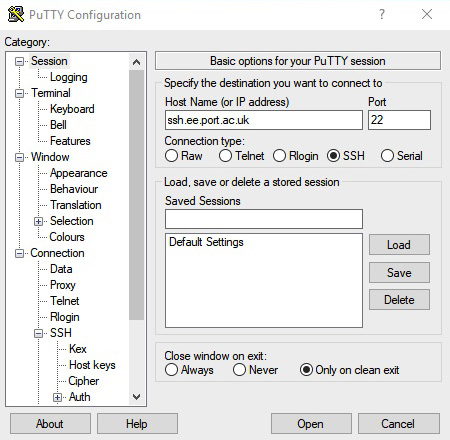
If this is the first time you are connecting to the gateway server from this machine, you will be prompted to accept a security key fingerprint. Select Yes to this prompt.
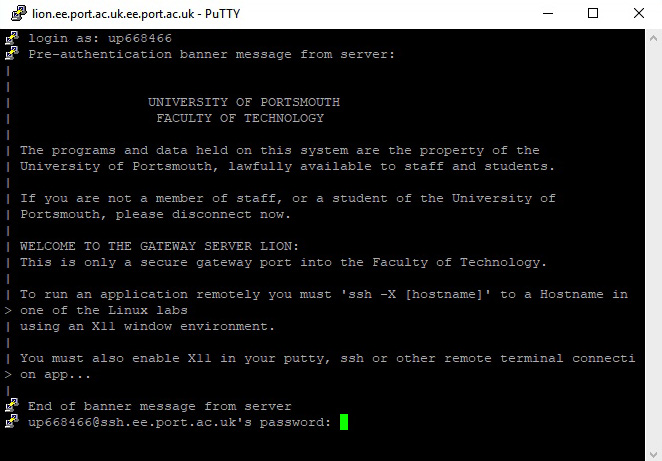
Login to the gateway server using your university username and password.
You will now be able to ssh on to a machine in one of the Linux labs A2.02 or A2.03 with the -X options to allow display back to your host.
ssh -X username@hostname [ e.g. mouse, rabbit, fox, bode, bell, marconi... ]
E.g. Type in the name of the application you wish to run in the terminal window
example: [ opnet ] or [ firefox ] or [ matlab ] or [ sage ]
You can press the key sequence of CTRL +C to quit if there are any problems
Install the Xquartz program for X11 display (xquartz is the official X server software for mac).
Agree to all the default options, and create desktop/quick launch items if desired.
Using your preferred editor (we have used vim), edit the ssh_config file is modified to allow X11 forwarding.
vim /etc/ssh/ssh_config
XAuthLocation /opt/X11/bin/xauth
ForwardAgent yes
ForwardX11 yes
Launch XQuartz and select Terminal from within XQuartz (you may need to right-click on XQuartz, select Applications, Terminal).
Connect to the gateway server using the following command, substituting username with your login credentials. Accept the fingerprint when prompted, followed by your password.
ssh -X [email protected]
Connect to the lab machine, again substituting username with your login credentials, and hostname with the name of a machine in either A2.02 or A2.03. Accept the fingerprint when prompted, followed by your password.
ssh -X username@hostname
You will now be able to launch your application from the remote PC, such as Opnet, which will display on your own machine.
E.g. Type in the name of the application you wish to run in the terminal window
example: [ opnet ] or [ firefox ] or [ matlab ] or [ sage ]
You can press the key sequence of CTRL +C to quit if there are any problems
| A2.02 Hostnames | A2.03 Hostnames | PO 2.27 Hostnames | LG 0.14a Hostnames | LG 0.14b Hostnames |
|---|---|---|---|---|
| bear | ||||
| beaver | LG014B-PC01 | |||
| bison | LG014B-PC02 | |||
| bull | LG014B-PC03 | |||
| camel | LG014B-PC04 | |||
| cheetah | LG014B-PC05 | |||
| chimp | LG014B-PC06 | |||
| chipmunk | LG014B-PC07 | |||
| cougar | LG014B-PC08 | |||
| coyote | LG014B-PC09 | |||
| deer | LG014B-PC10 | |||
| elk | LG014B-PC11 | |||
| ampere | fox | LG014B-PC12 | ||
| bell | gazelle | LG014A-PC01 | LG014B-PC13 | |
| bode | gerbil | LG014A-PC02 | LG014B-PC14 | |
| boole | giraffe | PO227PC01 | LG014A-PC03 | LG014B-PC15 |
| bose | goat | PO227PC02 | LG014A-PC04 | LG014B-PC16 |
| coulomb | gorilla | PO227PC03 | LG014A-PC05 | LG014B-PC17 |
| dirac | hippo | PO227PC04 | LG014A-PC06 | LG014B-PC18 |
| doppler | horse | PO227PC05 | LG014A-PC07 | LG014B-PC19 |
| edison | hyena | PO227PC06 | LG014A-PC08 | LG014B-PC20 |
| euler | ibex | PO227PC07 | LG014A-PC09 | LG014B-PC21 |
| fermi | impala | PO227PC08 | LG014A-PC10 | LG014B-PC22 |
| henry | jackal | PO227PC09 | LG014A-PC11 | LG014B-PC23 |
| hertz | jaguar | PO227PC10 | LG014A-PC12 | LG014B-PC24 |
| joule | kanga | PO227PC11 | LG014A-PC13 | LG014B-PC25 |
| laplace | koala | PO227PC12 | LG014A-PC14 | LG014B-PC26 |
| marconi | kudu | PO227PC13 | LG014A-PC15 | LG014B-PC27 |
| maxwell | lempur | PO227PC14 | LG014A-PC16 | LG014B-PC28 |
| morse | leopard | PO227PC15 | LG014A-PC17 | LG014B-PC29 |
| napier | llama | PO227PC16 | LG014A-PC18 | LG014B-PC30 |
| newton | lynx | PO227PC17 | LG014A-PC19 | LG014B-PC31 |
| norton | marmot | PO227PC18 | LG014A-PC20 | LG014B-PC32 |
| ohm | meerkat | PO227PC19 | LG014A-PC21 | LG014B-PC33 |
| planck | mink | PO227PC20 | LG014A-PC22 | LG014B-PC34 |
| siemen | mouse | PO227PCLECT | LG014A-PC23 | LG014B-PC35 |
| tellegen | mule | LG014A-PC24 | LG014B-PC36 | |
| tesla | ocelot | LG014A-PCLECT | LG014B-PC37 | |
| volta |
okapi |
LG014B-PC38 | ||
| watt | otter | LG014B-PC39 | ||
| panda | LG014B-PC40 | |||
| quagga | LG014B-PC41 | |||
| rabbit | LG014B-PC42 | |||
| rhino | LG014B-PC43 | |||
| sheep | LG014B-PC44 | |||
| shrew | LG014B-PC45 | |||
| squirrel | LG014B-PC46 | |||
| tapir | LG014B-PC47 | |||
| vixen | LG014B-PC48 | |||
| wolf | LG014B-PCLECT | |||
| wombat | ||||
| zebra |
Turn on notifications for critical updates like closures, safety alerts, and urgent service disruptions.


