Image

You have access to University network storage space (N drive) and your University Google account gives you access to cloud storage - Google Drive.
Please note: Google Drive is due to be retired. Personal files to be migrated to Microsoft OneDrive. Shared files will be migrated at a later date to Microsoft SharePoint. Please check the MWP Information Site for more information.
You can use Google Drive to store and access files from any device. Sign in to Google Drive with your University account.
Any shared drives you have access to will show in the Shared drives section in the menu on the left. You can find Google Drive from the app menu located in the top right of the page in Chrome.
You can use OneDrive to store and access your files securely from any device. Sign in at office.com with your University account.
Any shared files or folders that have been shared with you will appear in the Shared section on the left-hand menu. You can also find OneDrive in the app launcher (the grid icon) at the top left of office.com.
On Windows 11, OneDrive is the default location for saving files and is built into File Explorer. Files saved to your OneDrive will be automatically available across devices. You can also install the OneDrive app on macOS or mobile devices for seamless access.
For more information on file storage options, see the Storing Your Files article.
IT Training also run regular sessions on OneDrive and Microsoft 365 apps. The current schedule can be found in the Staff IT Training article.
Your University account has a storage capacity of 10GB in Outlook and 15GB in OneDrive. For more information, please see the Working with OneDrive article.
The N and K Drives are your network storage areas. They will always be available when you log into a standard PC or Mac on campus and files can be restored for up to 3 weeks after they've been modified.
The K drive is a place to store departmental documents you'd like to be available to others, such as classmates and professors. Your access to the K drive will be limited to your departmental area.
Your N drive contains vital system configuration files without which you won't be able to use the computer systems – please ensure you don't delete any files you didn't create.
Your N drive has a 20GB storage capacity.
You must connect to the VPN before connecting to the N and K Drives (this includes on and off site).
You can restore files that have been accidentally deleted or saved over by following these instructions.
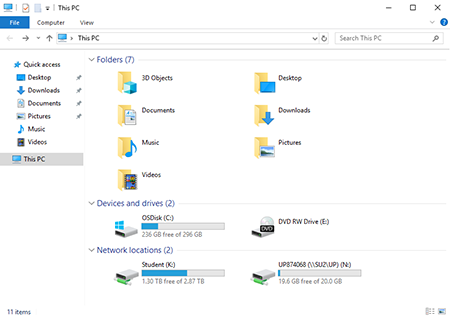
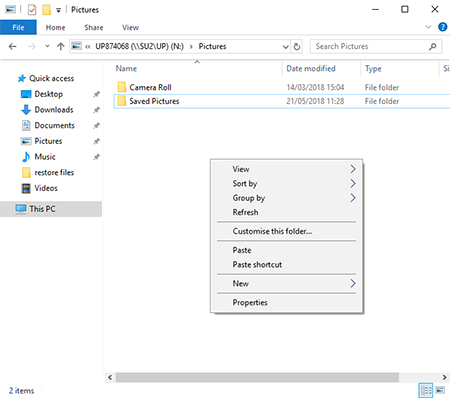
Double click on This PC, and navigate to where the missing/changed file was located.

Right click on the white area in the folder and click Properties.
Click the Previous Versions tab, here you will see a list of folders. These folders are the same folder captured at different periods in time.
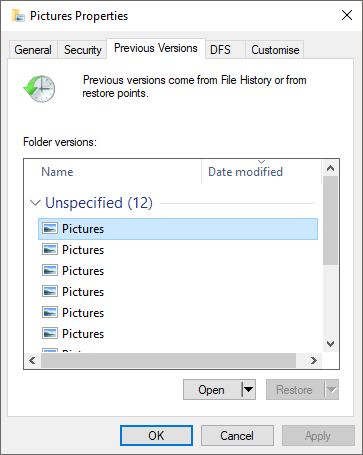
Select a time just before the file was deleted/changed and then click Open. This will open a previous version of the folder from the date and time specified.
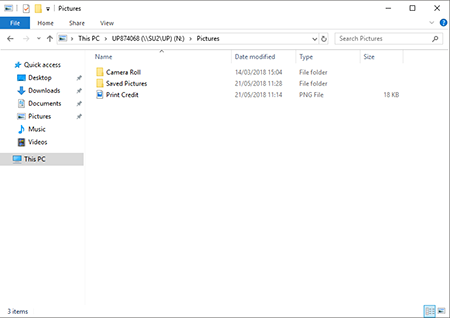
Find the file you have deleted or changed and simply drag it into the current version of the folder. You may also copy and paste the file if this is easier.
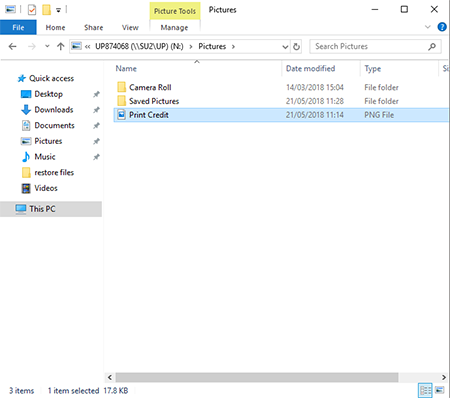
1. Copy the selected file from the context menu of the missing file
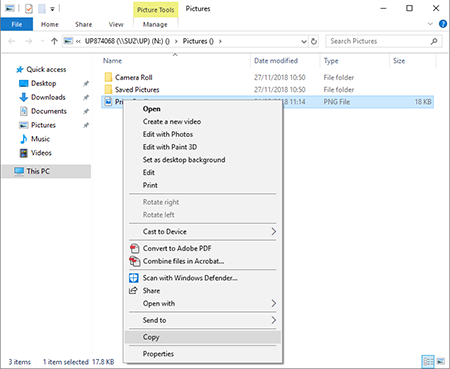
2. Paste selected from the context menu of the destination folder
3. The missing file will be restored to the N drive
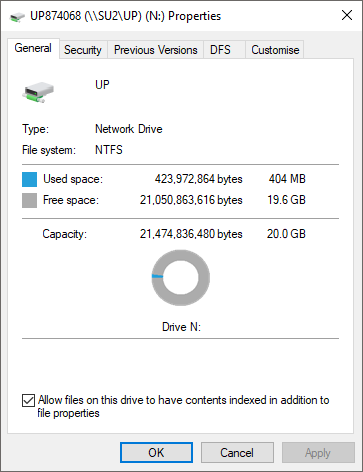
You can view your quota from a University PC by double-clicking This PC on the desktop, then right-clicking your N drive from the list of network drives, then select Properties.
The General tab will show you the amount of space you are currently using and the amount of space you have left.
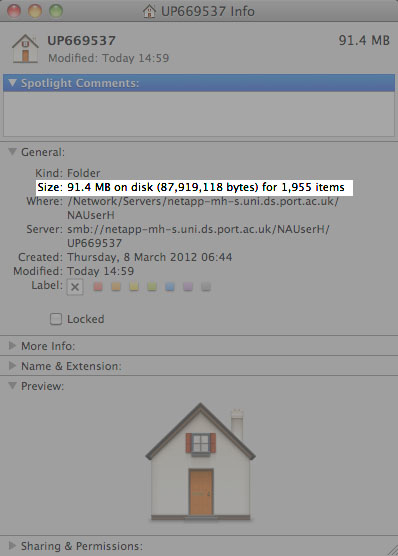
You can view your quota from a University Mac by selecting your N drive (home directory) from the sidebar and choose 'i'. After a few moments, the size of your N drive is shown in the information window.
Please note that the Macs do not give a warning message if the capacity of N drive is reached. You will receive an email stating that you should clean your N drive before that.
You can access your personal N drive and public K drive when studying away from campus.
You must connect to the VPN before connecting to the N and K Drives (this includes on and off site).
1.Connect to the VPN.
Find your N drive location using Find my N Drive tool. Copy the full path under the N DRIVE (WINDOWS) e.g. \\SU2.uni.ds.port.ac.uk\UP\up874069 to the clipboard.
2. Open Windows Explorer and select This PC in the navigator pane on the left.
3. Select Map network drive from the top menu bar.

4. Enter the following information then select Finish:
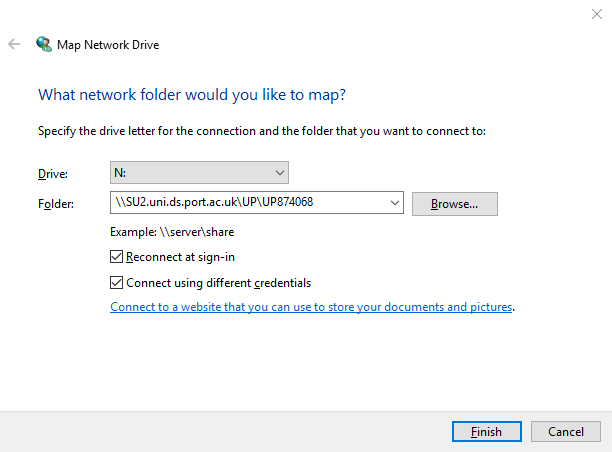
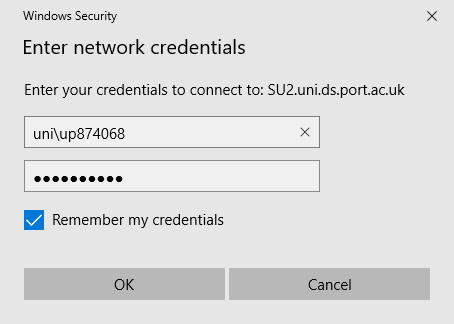
5. You will be prompted to enter your University username and password. You must prefix your University username with uni\ e.g uni\up123456. Tick Remember my credentials if you wish to remember your credentials and select OK
6. Your N drive will open in an Explorer Window. You can find your mapped network drive under Network locations in Windows Explorer.
1.Connect to the VPN.
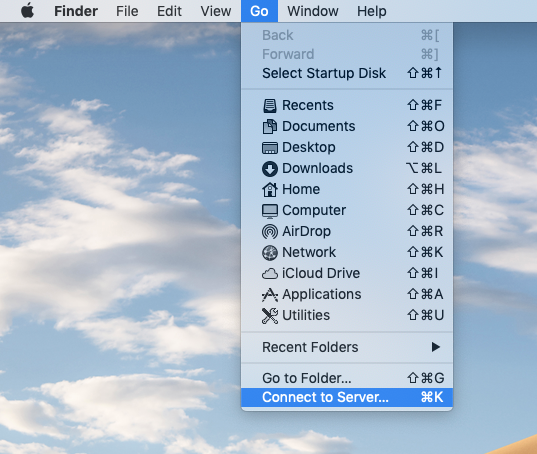
2.From the Finder menu, choose Go then Connect to Server...
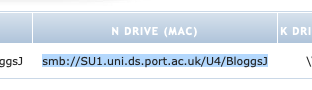
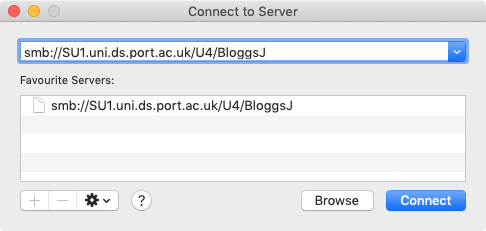
3. Find your N drive location using the Find my N Drive tool. Copy the full path under the N DRIVE (MAC) heading, e.g. smb://SU1.uni.ds.port.ac.uk/U4/BloggsJ to the clipboard.
4. Paste the N: drive path into the input box. You can use the button to add the path to your favourite servers. Then click Connect
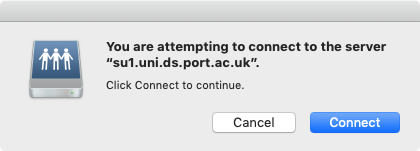
5. You may be presented with a connection warning, click Connect
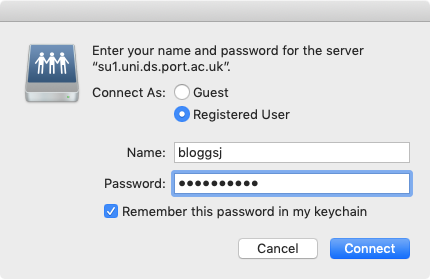
6. Enter your University username and password when prompted, if you would like to remember the login details, select the Remember this password in my keychain
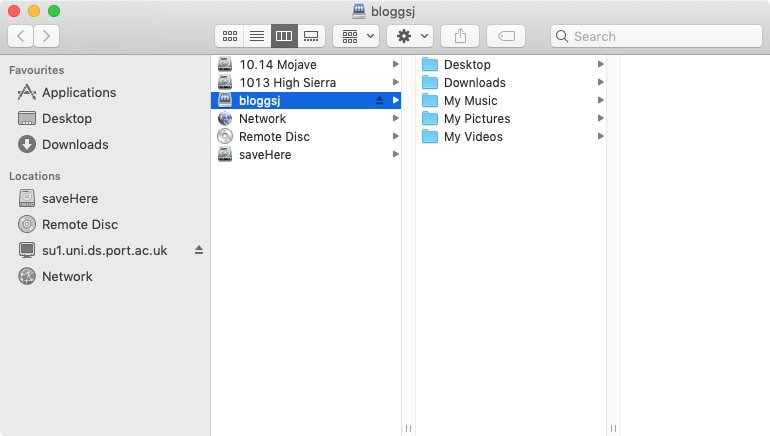
7. Your N: drive will appear in a Finder window once connected
1. Connect to the VPN.
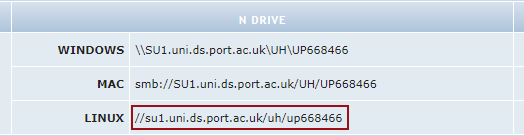
2. Visit the Find my N drive tool and look up your account. Copy the server path under N DRIVE > LINUX e.g. //su1.uni.ds.port.ac.uk/uh/up123456
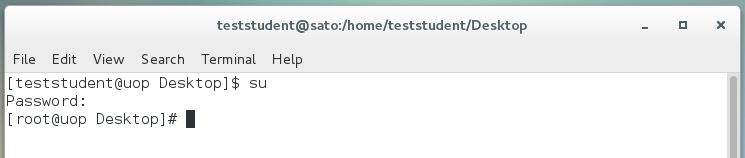
3. Open a terminal (ensure you are a superuser e.g. root, or use the sudo prefix).
4. Create a mount point, substituting $username with your computer account username:
mkdir /mnt/$username
e.g.
mkdir /mnt/up123456

5. Mount the N drive to the mount point you just created. Ensure you use lowercase, replace $username with your username and $server with the server path found earlier.
mount -t cifs $server -o username=$username,rw,sec=ntlmssp,vers=3.0 /mnt/$username
e.g.
mount -t cifs //su1.uni.ds.port.ac.uk/uh/up123456 -o username=up668466,rw,sec=ntlmssp,vers=3.0 /mnt/up668466
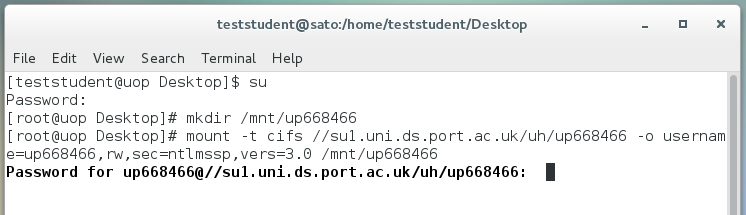
6. Enter your computer account password when prompted.
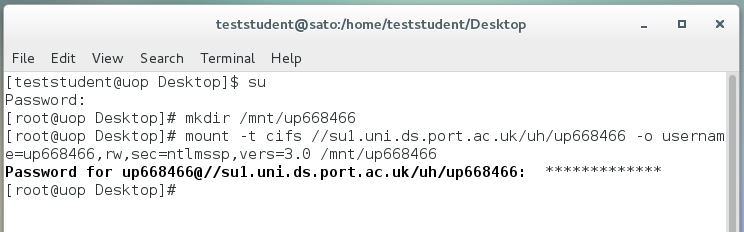
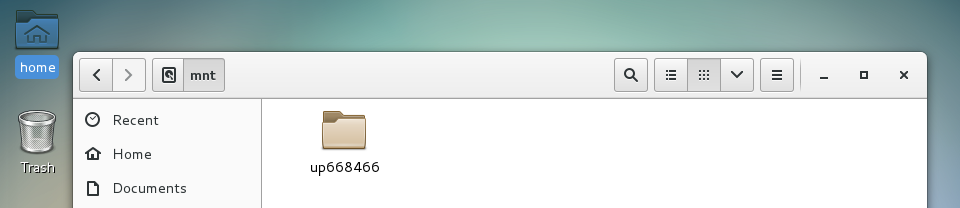
7. Your N drive will now be connected. If you prefer to browse your N drive from the GUI navigate to the mnt folder.
umount /mnt/$username
e.g.
umount /mnt/up123456

1. Connect to the VPN.
2. To map the K drive, open Windows Explorer.
3. Select This PC in the navigator pane on the left.
4. Select Map network drive from the top menu bar.

5. Enter the following information then select Finish:
6. You will be prompted to enter your University username and password. You must prefix your University username with uni\ e.g uni\up874068. Tick Remember my credentials if you wish to remember your credentials and select OK

7. Your N drive opens in an Explorer Window. You can find your mapped network drive under Network locations in Windows Explorer.
1. Connect to the VPN
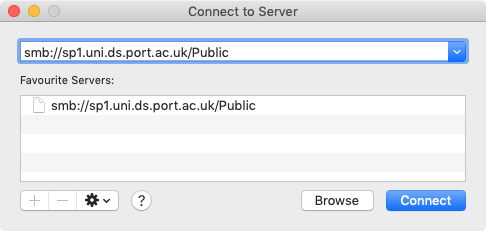
2. From the Finder menu, choose Go then Connect to Server...

3. Enter the path smb://sp1.uni.ds.port.ac.uk/Public

4. You can use the plus button to add the path to your favourite servers. Then click Connect
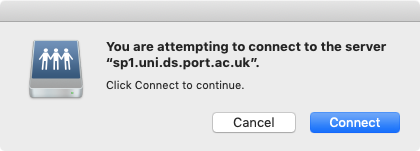
5. You may be presented with a connection warning, click Connect
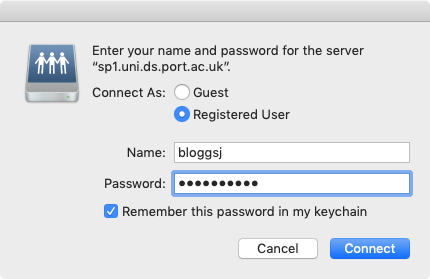
6. Enter your University username and password when prompted, if you would like to remember the login details, select the Remember this password in my keychain
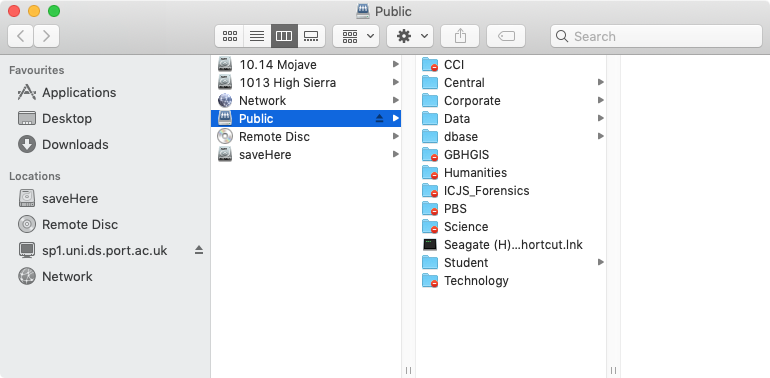
7. The K: drive will appear in a Finder window once connected
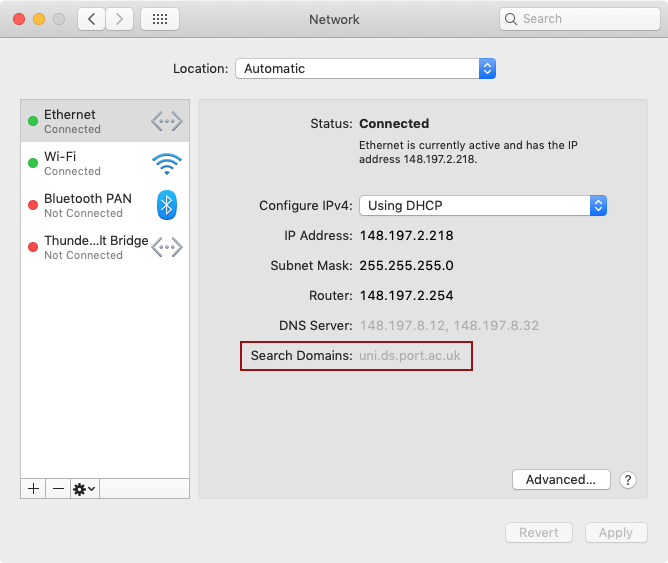
There should be no need to configure search domains but if you are experiencing an issue connecting to your drives on a Mac, you can check the search domains have been detected and add them manually if not.
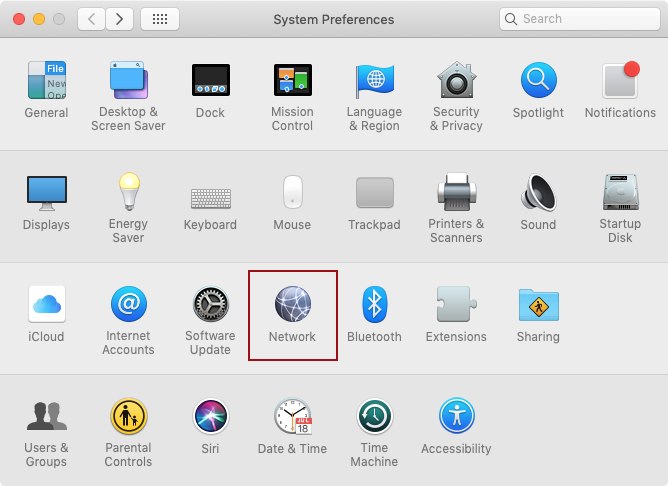
Choose System Preferences from the Apple menu, then choose Network.
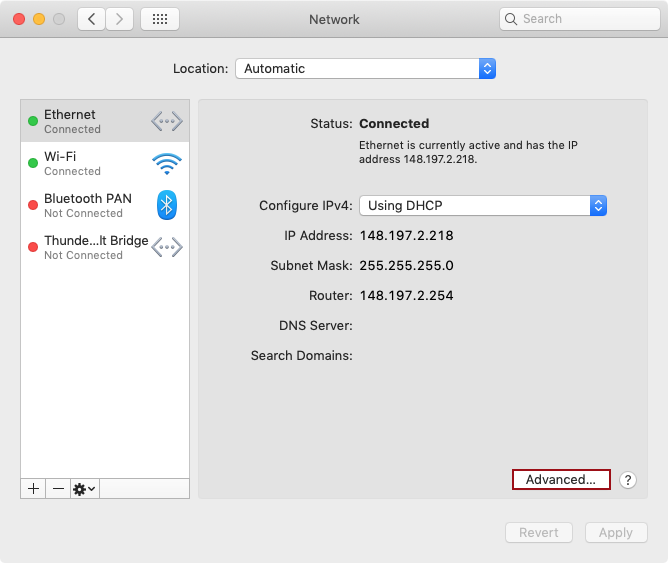
Choose the connection you use to access your N: or K: drive (normally Automatic), if the Search Domains is populated with uni.ds.port.ac.uk you do not need to do anything further.

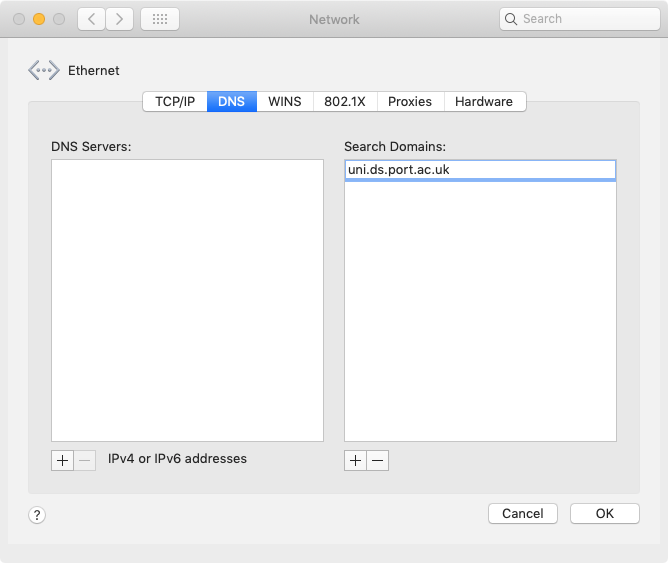
If the Search Domains is empty, click the Advanced button then choose the DNS tab.
Enter the search domain uni.ds.port.ac.uk in the panel on the right-hand side using the button, then click OK to save the settings – you may be prompted to enter your admin password.
Once you have returned to the Network pane, the Search Domain should now be populated. Press Apply and close System Preferences.
Contact the Service Desk:
Turn on notifications for critical updates like closures, safety alerts, and urgent service disruptions.


