Image

This article provides instructions for registering and setting up Multi-Factor Authentication (MFA) for Microsoft. MFA is required to access M365 applications, including Microsoft Teams and Outlook.
If you need help setting up MFA please contact the Service Desk.
Open a browser and navigate to https://mysignins.microsoft.com/security-info.
Select 'Add sign-in method'.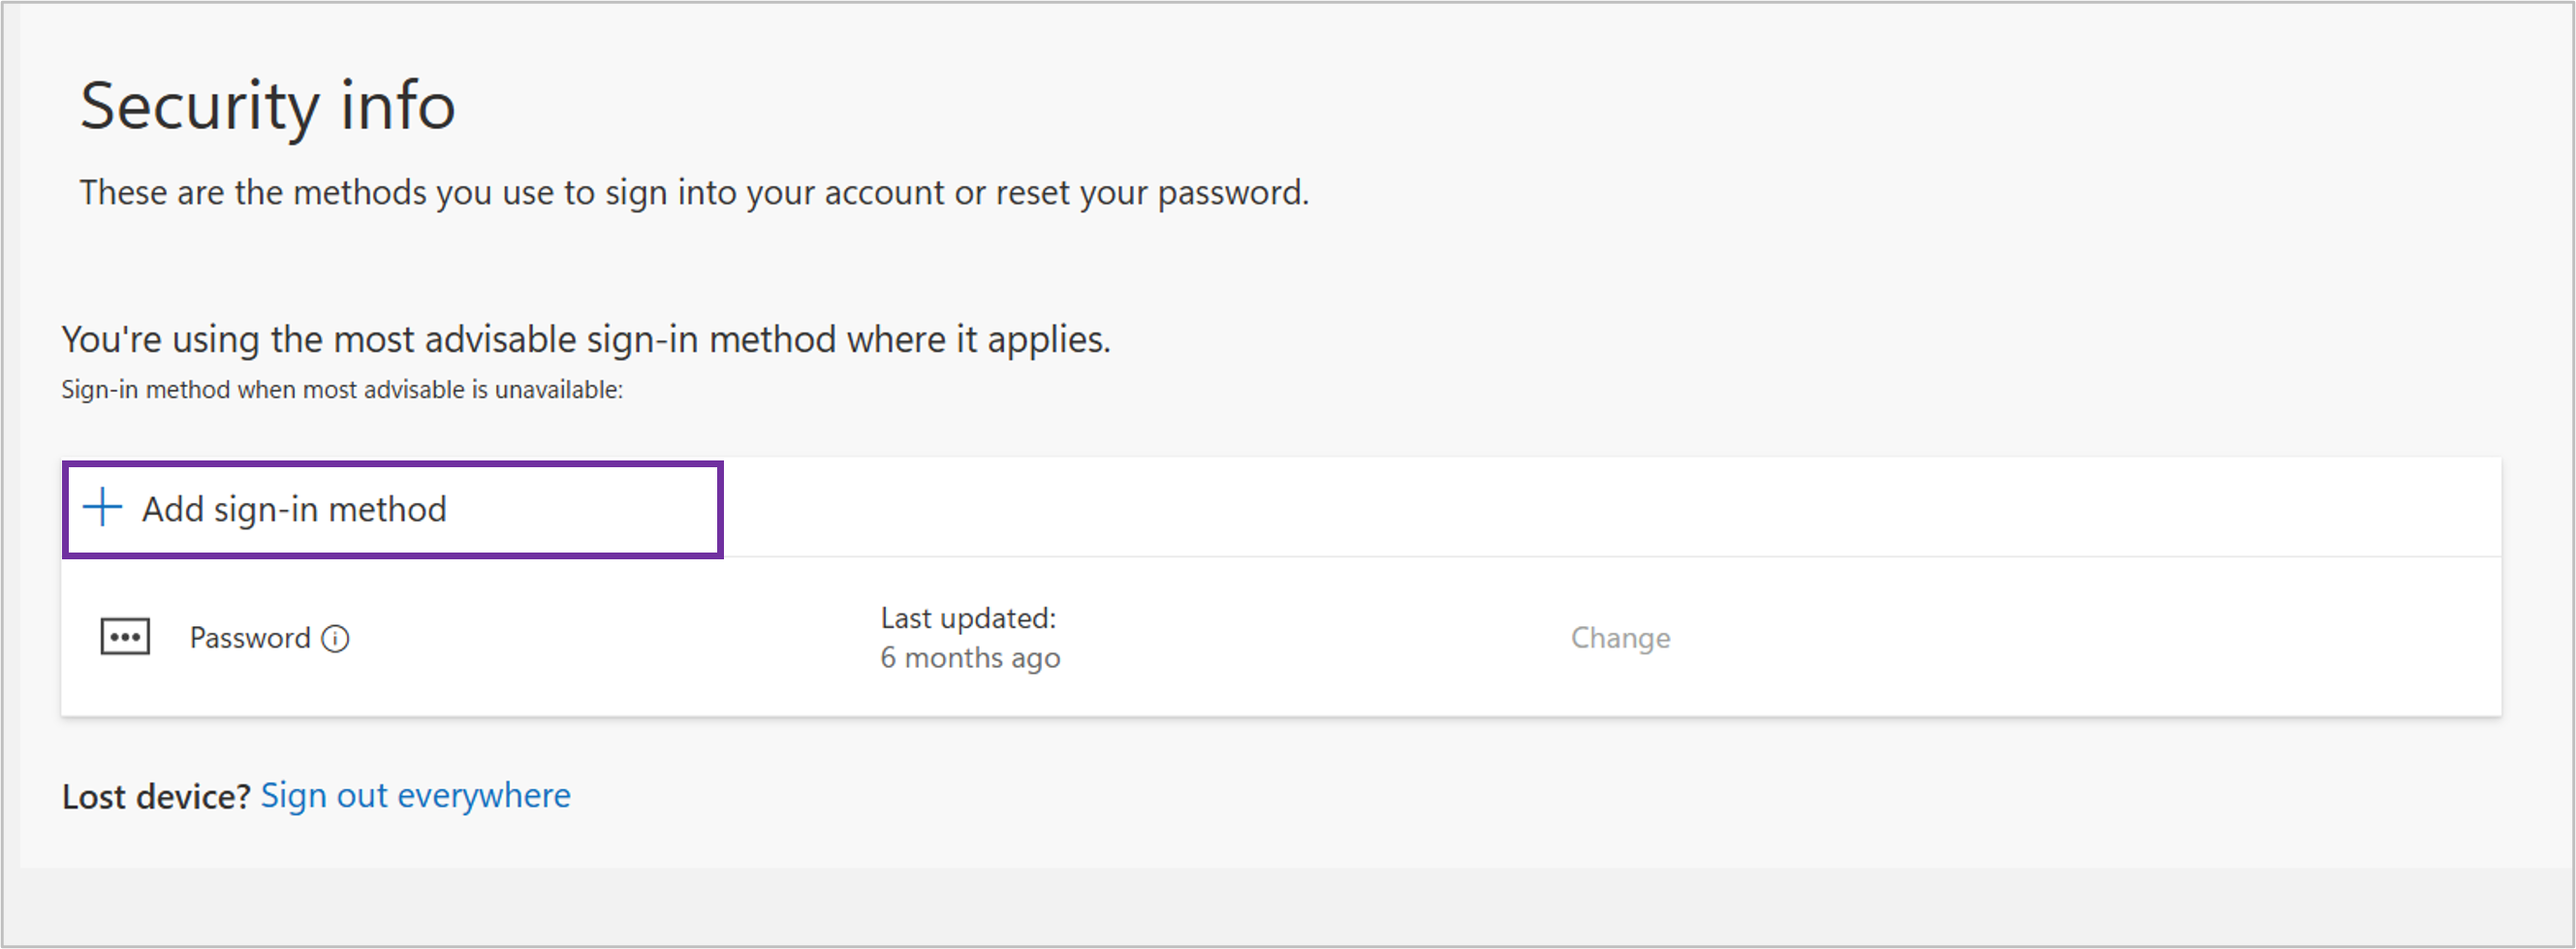
Choose the method you would like to add – the University strongly suggests you use the free 'Microsoft Authenticator' app. 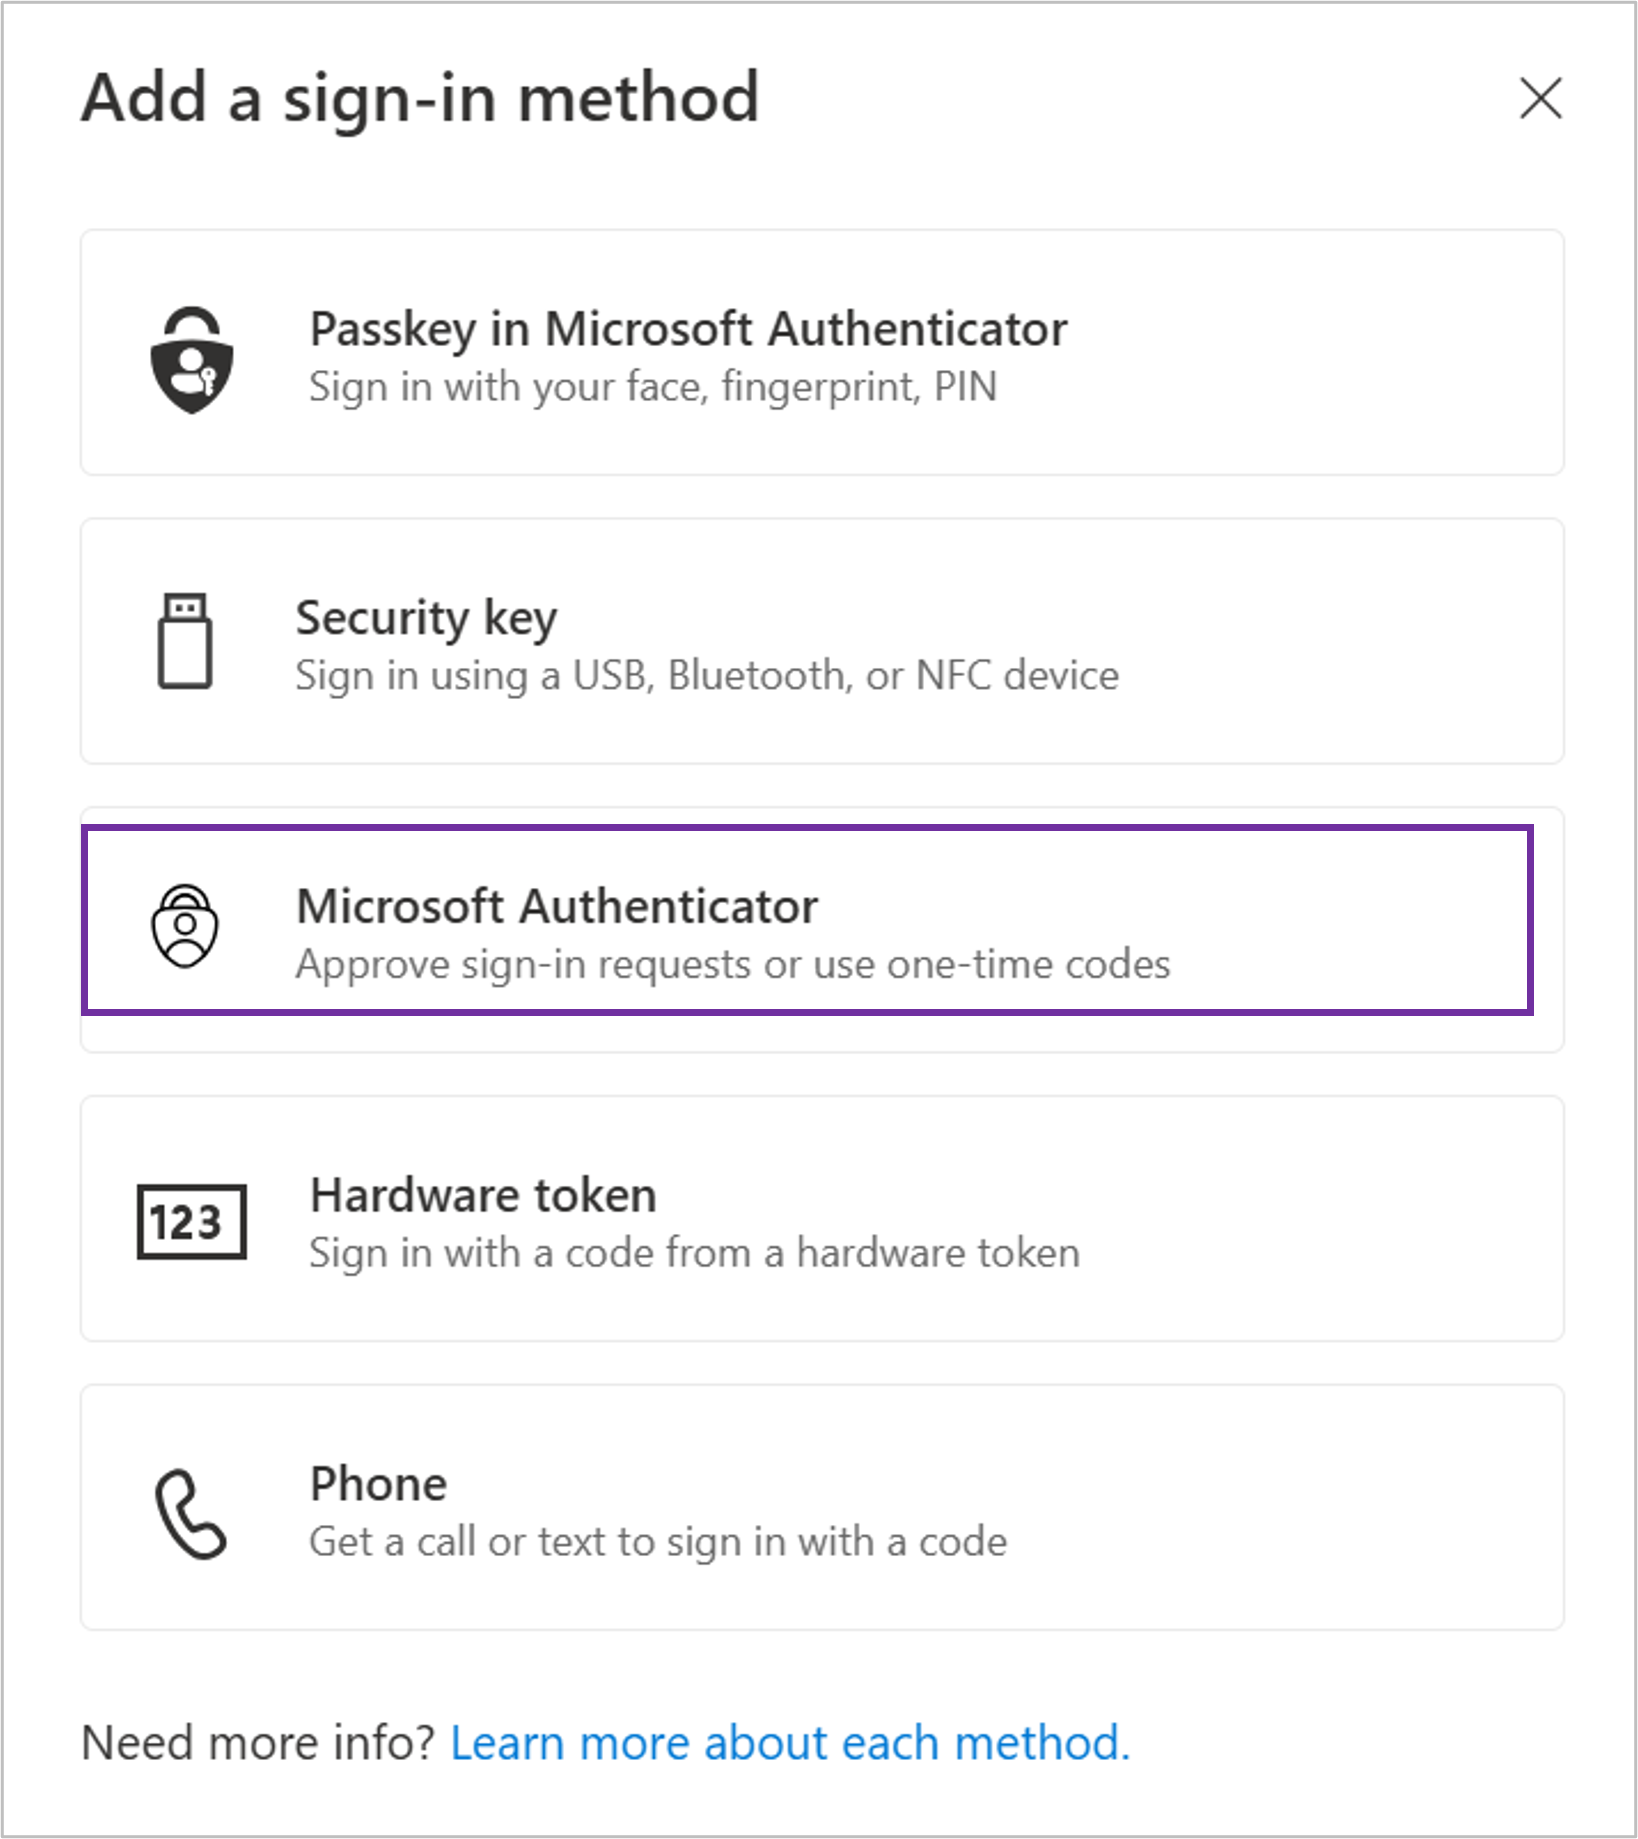
Download the Microsoft Authenticator app to your phone if you haven’t already. Once installed (or if you already have it), click ‘Next’.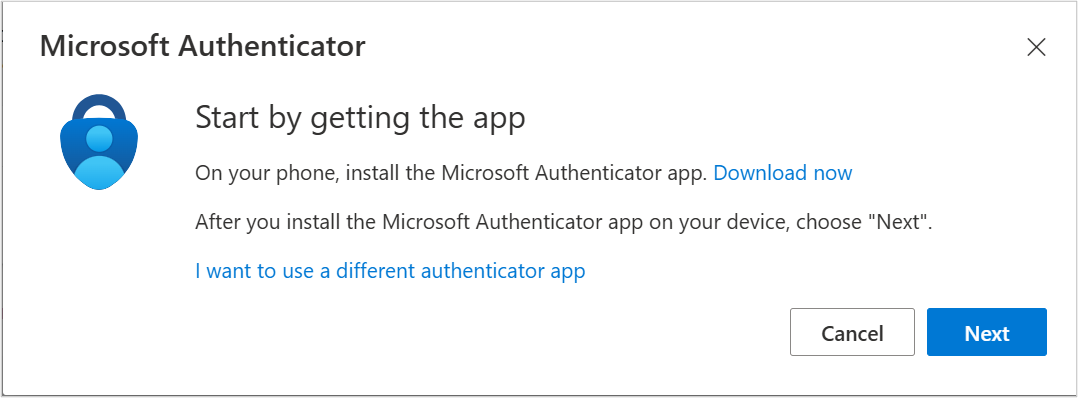
You will be prompted to set up your Microsoft Authenticator account on your phone. Once you have completed this click the 'Next' button.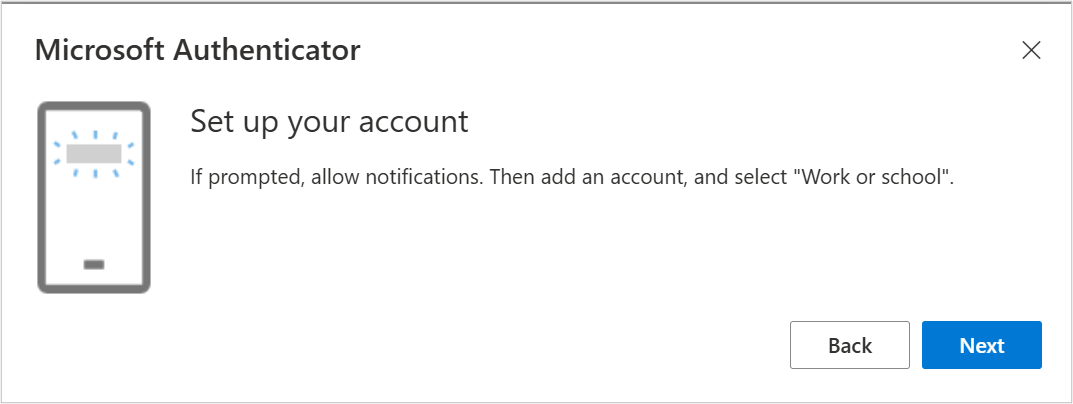
You will then be prompted to scan a QR Code displayed on the screen. Note: If you have already have the Microsoft Authenticator App click on '+' and select Work or School account followed by Scan QR Code. 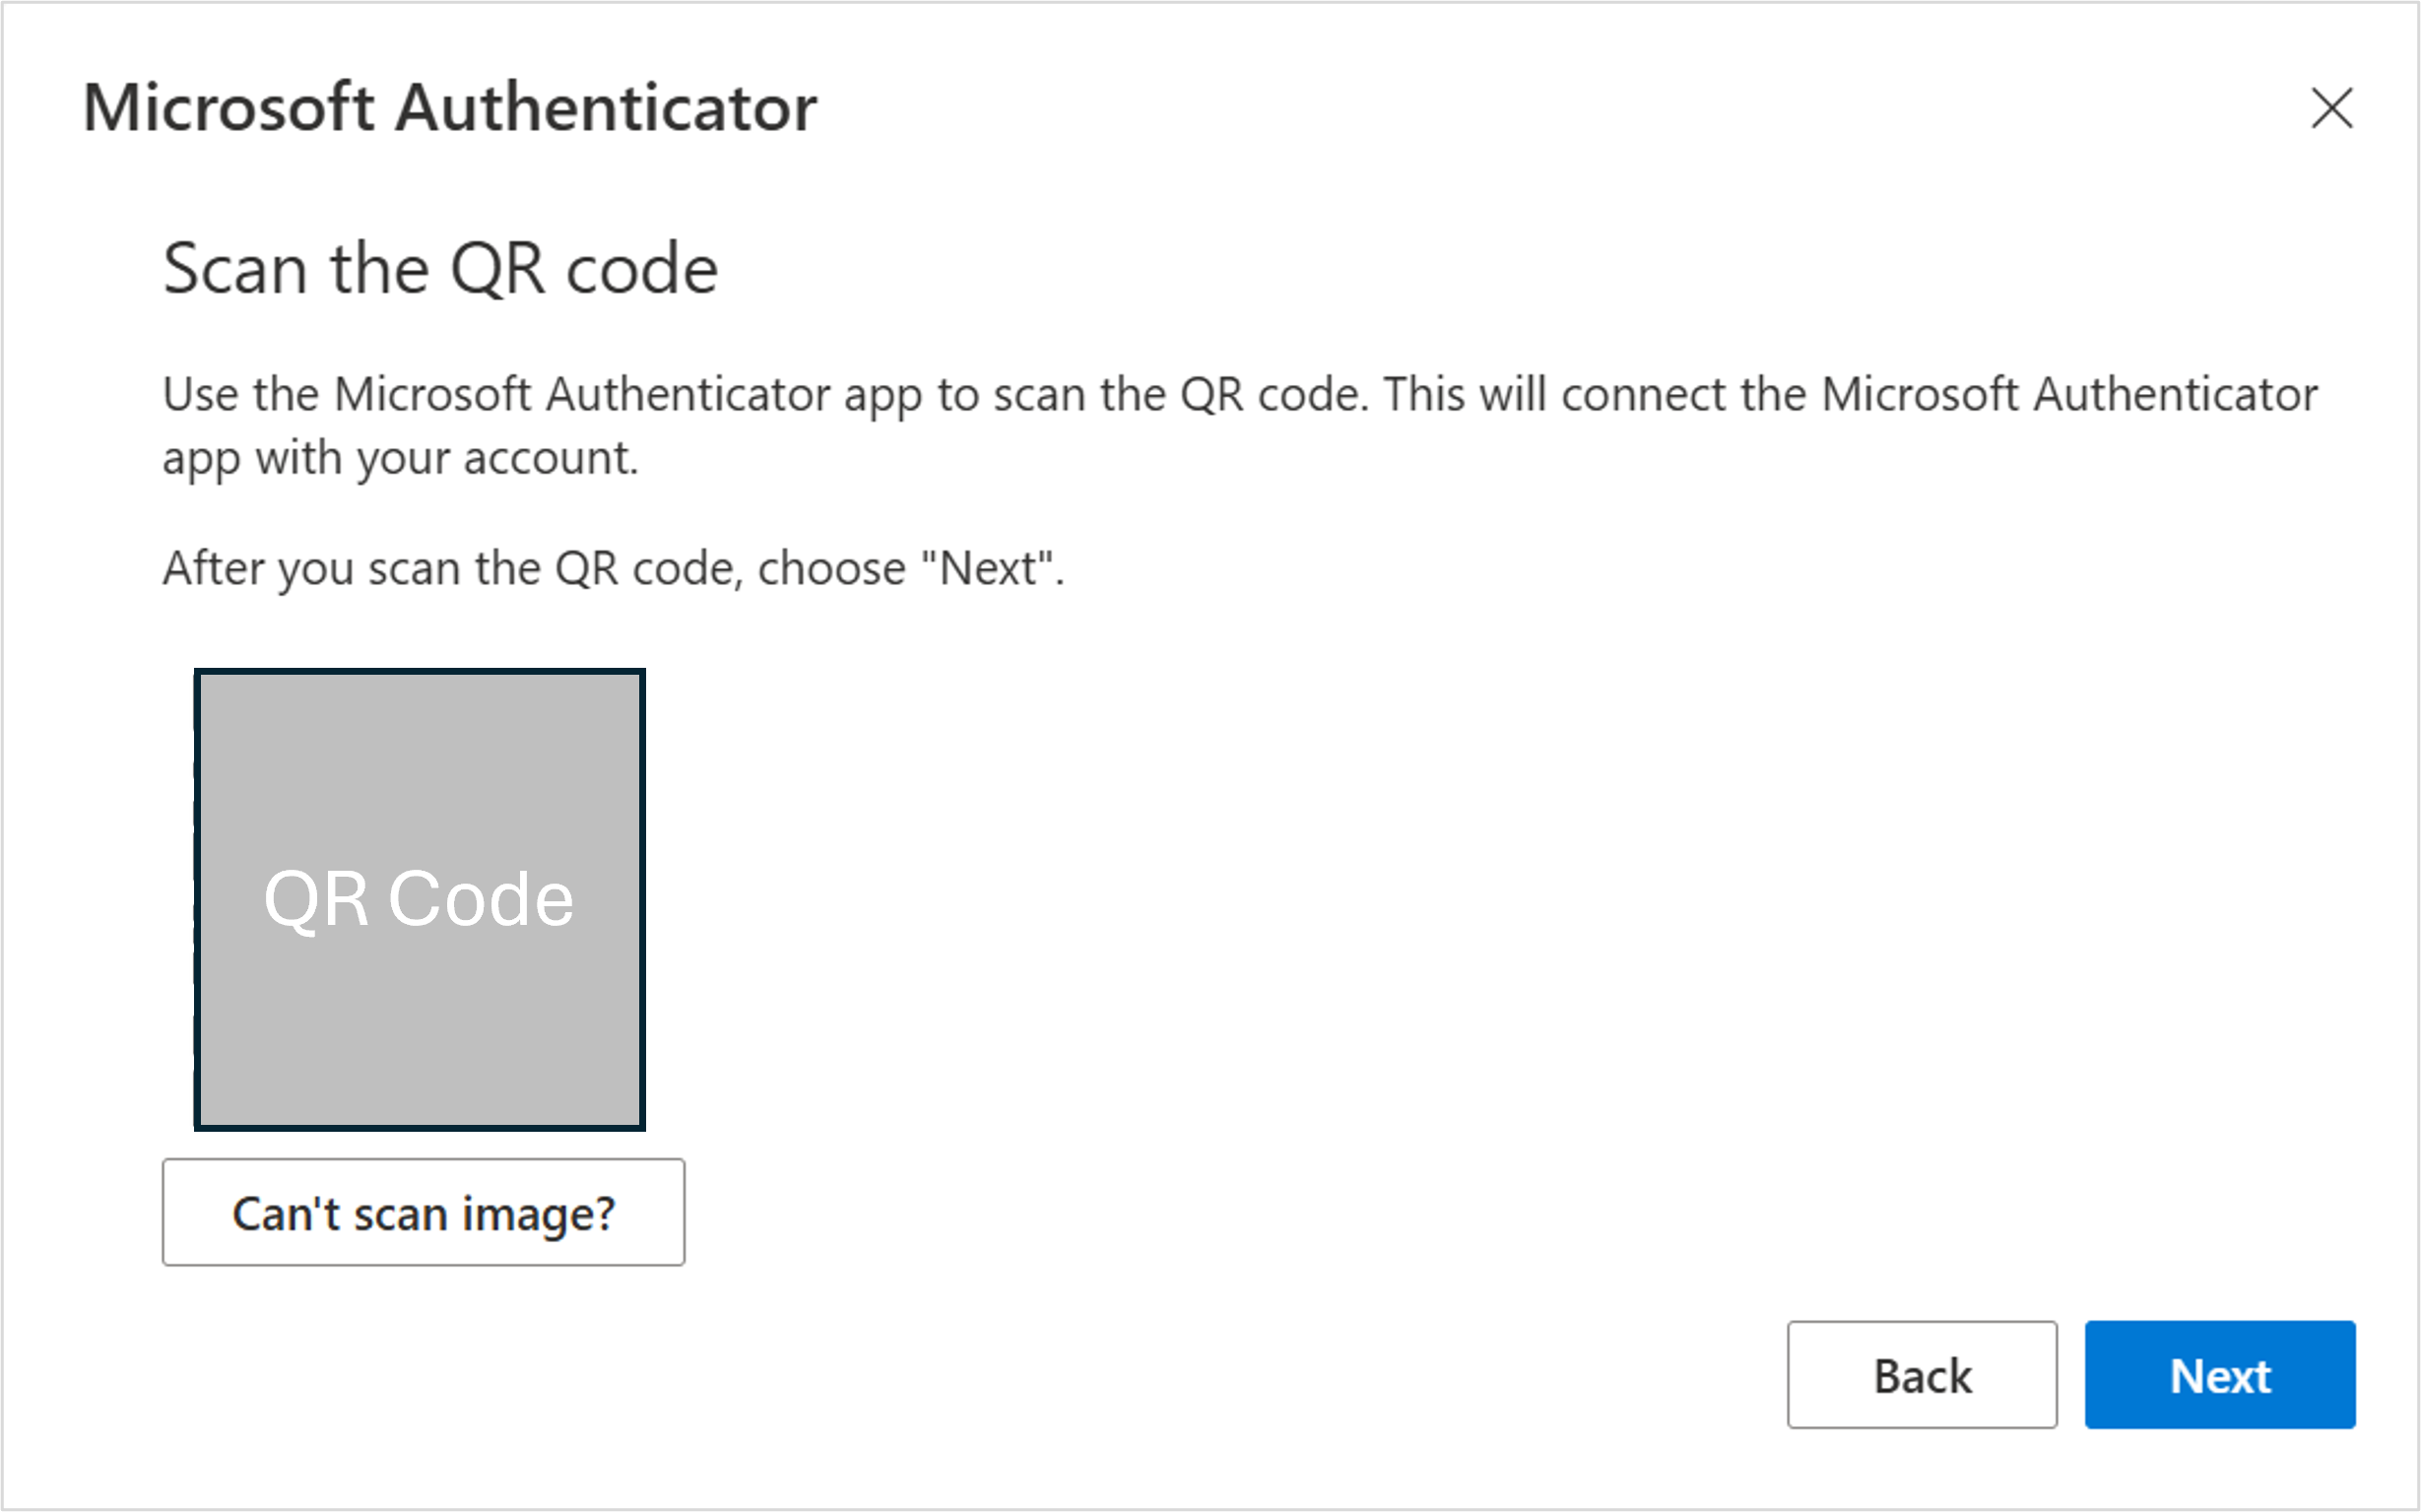
A code will be displayed on the screen which you will need to enter on your phone.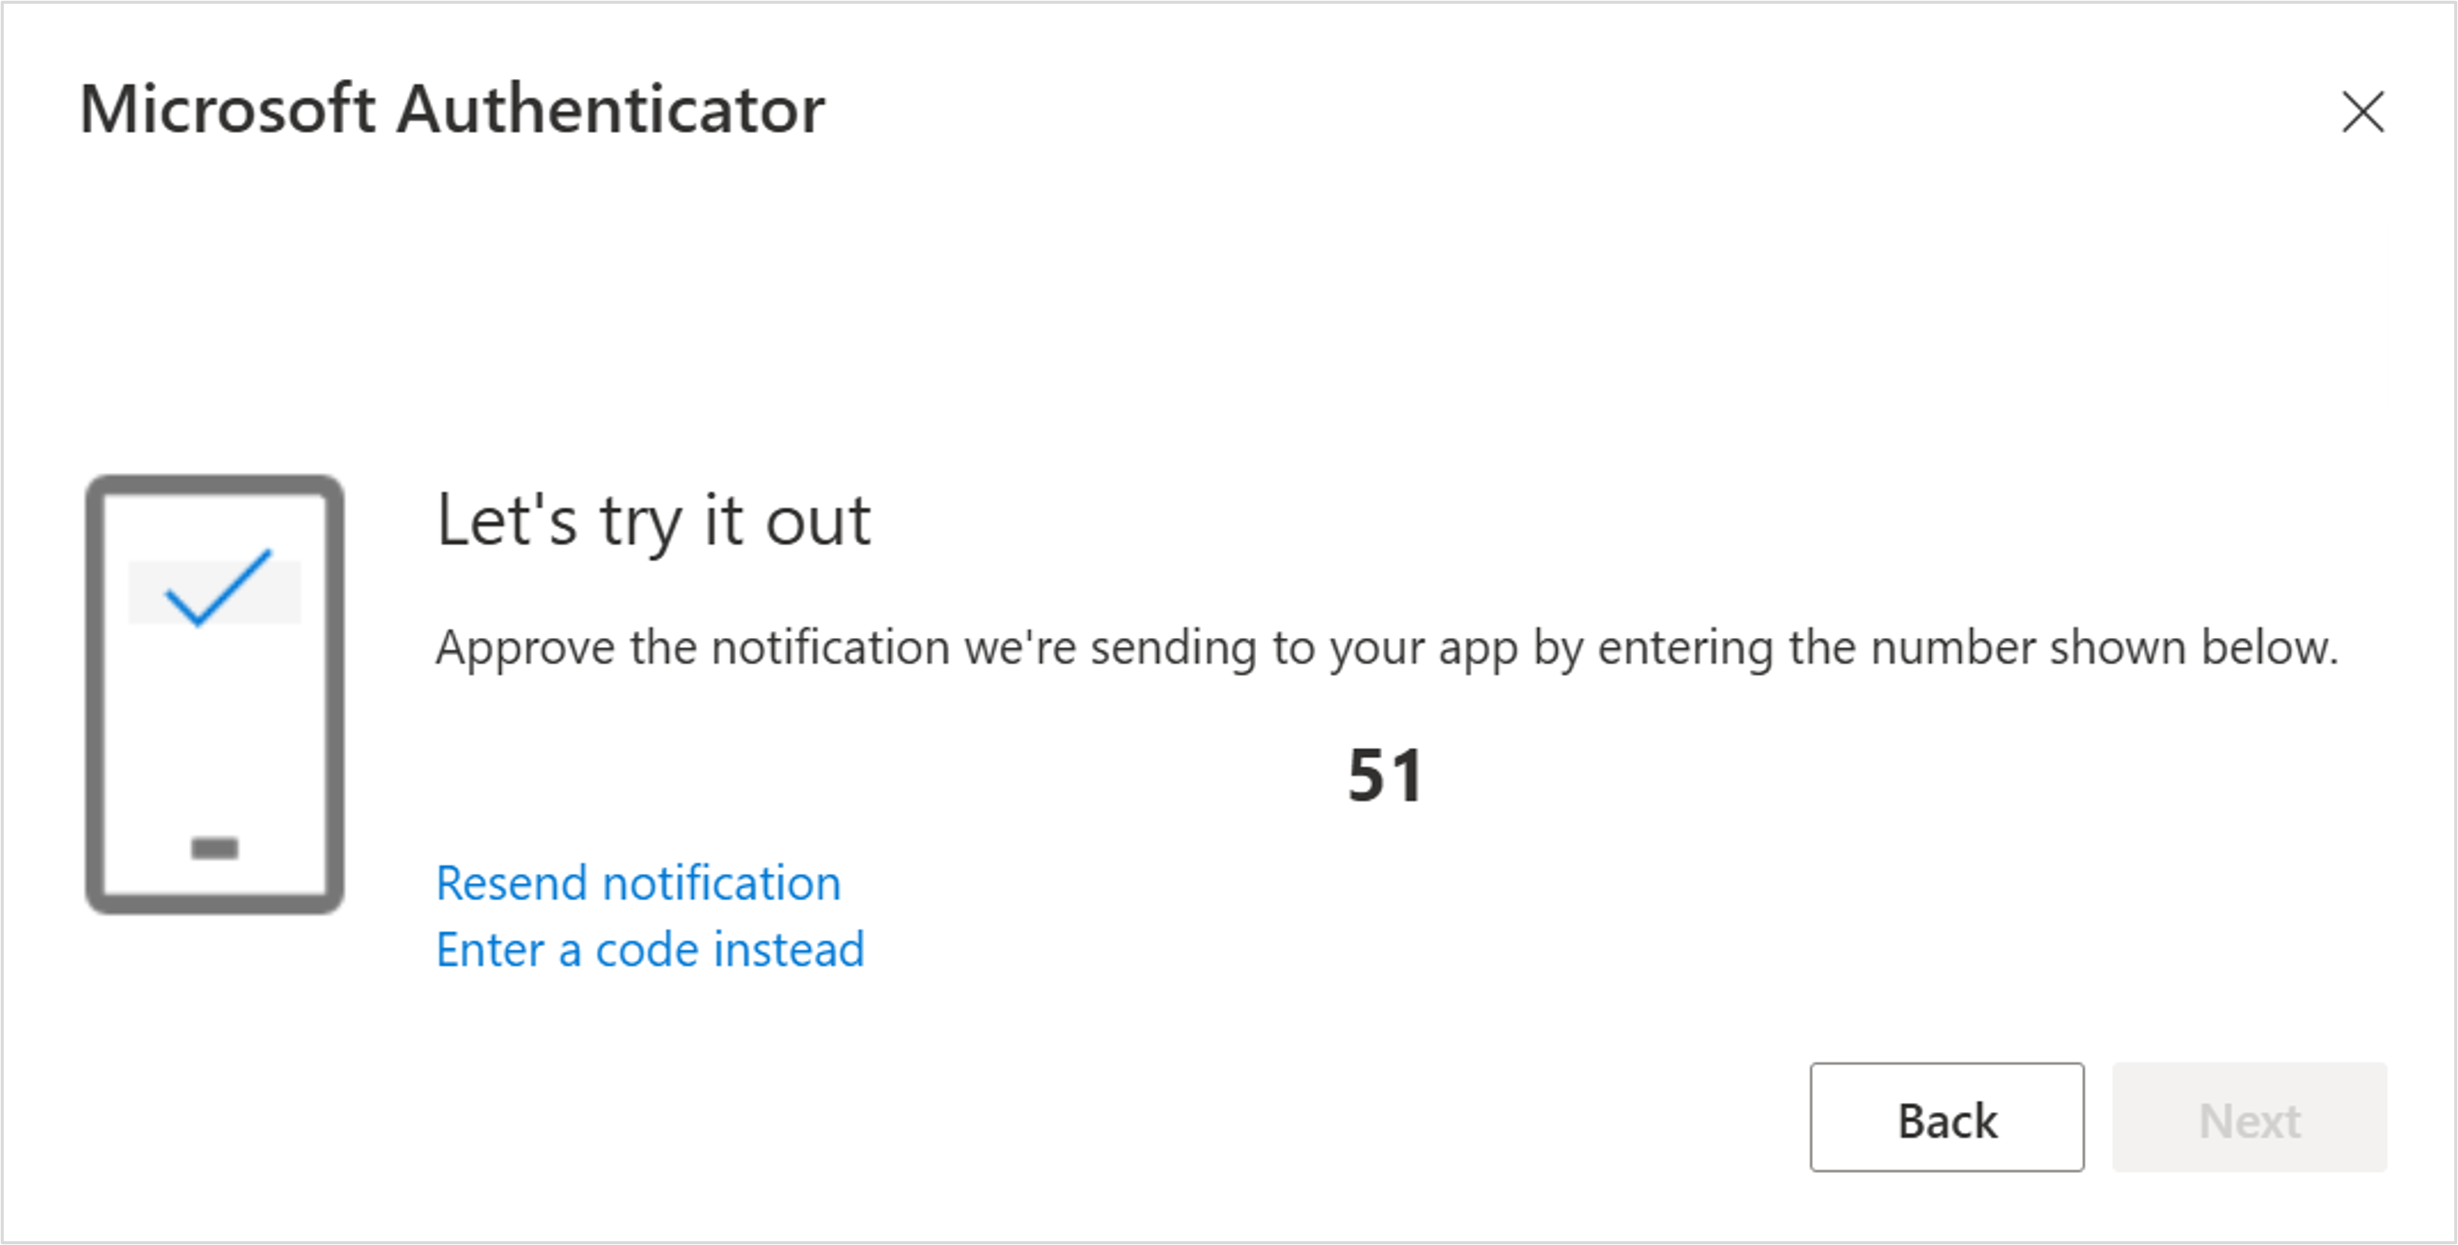
Your Microsoft Authenticator is now set up. When prompted for MFA when accessing a Microsoft application, open the Authenticator app and enter the number displayed to proceed.
To add a new method click Add sign-in method
Choose the method you would like to add – the University strongly suggests you use the free Microsoft Authenticator app.
Follow the instructions to add your sign-in method. You can add more than one method.
Click Delete next the method you would like to remove.
Follow the instructions to remove the method.
Contact the Service Desk:


